

3D Vector Data to Elevation Grid
1. Description
The 3D Vector Data To Elevation Grid analytic aims to transform a vector file that has been uploaded to the Aether into a Digital Surface Model (DSM). You will then be able to explore it as a common DSM, for example, to compare it with other data produced or imported into the Platform.
2. Inputs
To launch the analytics, the project must contain a vector file.
The input data must include three coordinates (x, y, and z) to represent a point in three-dimensional space.
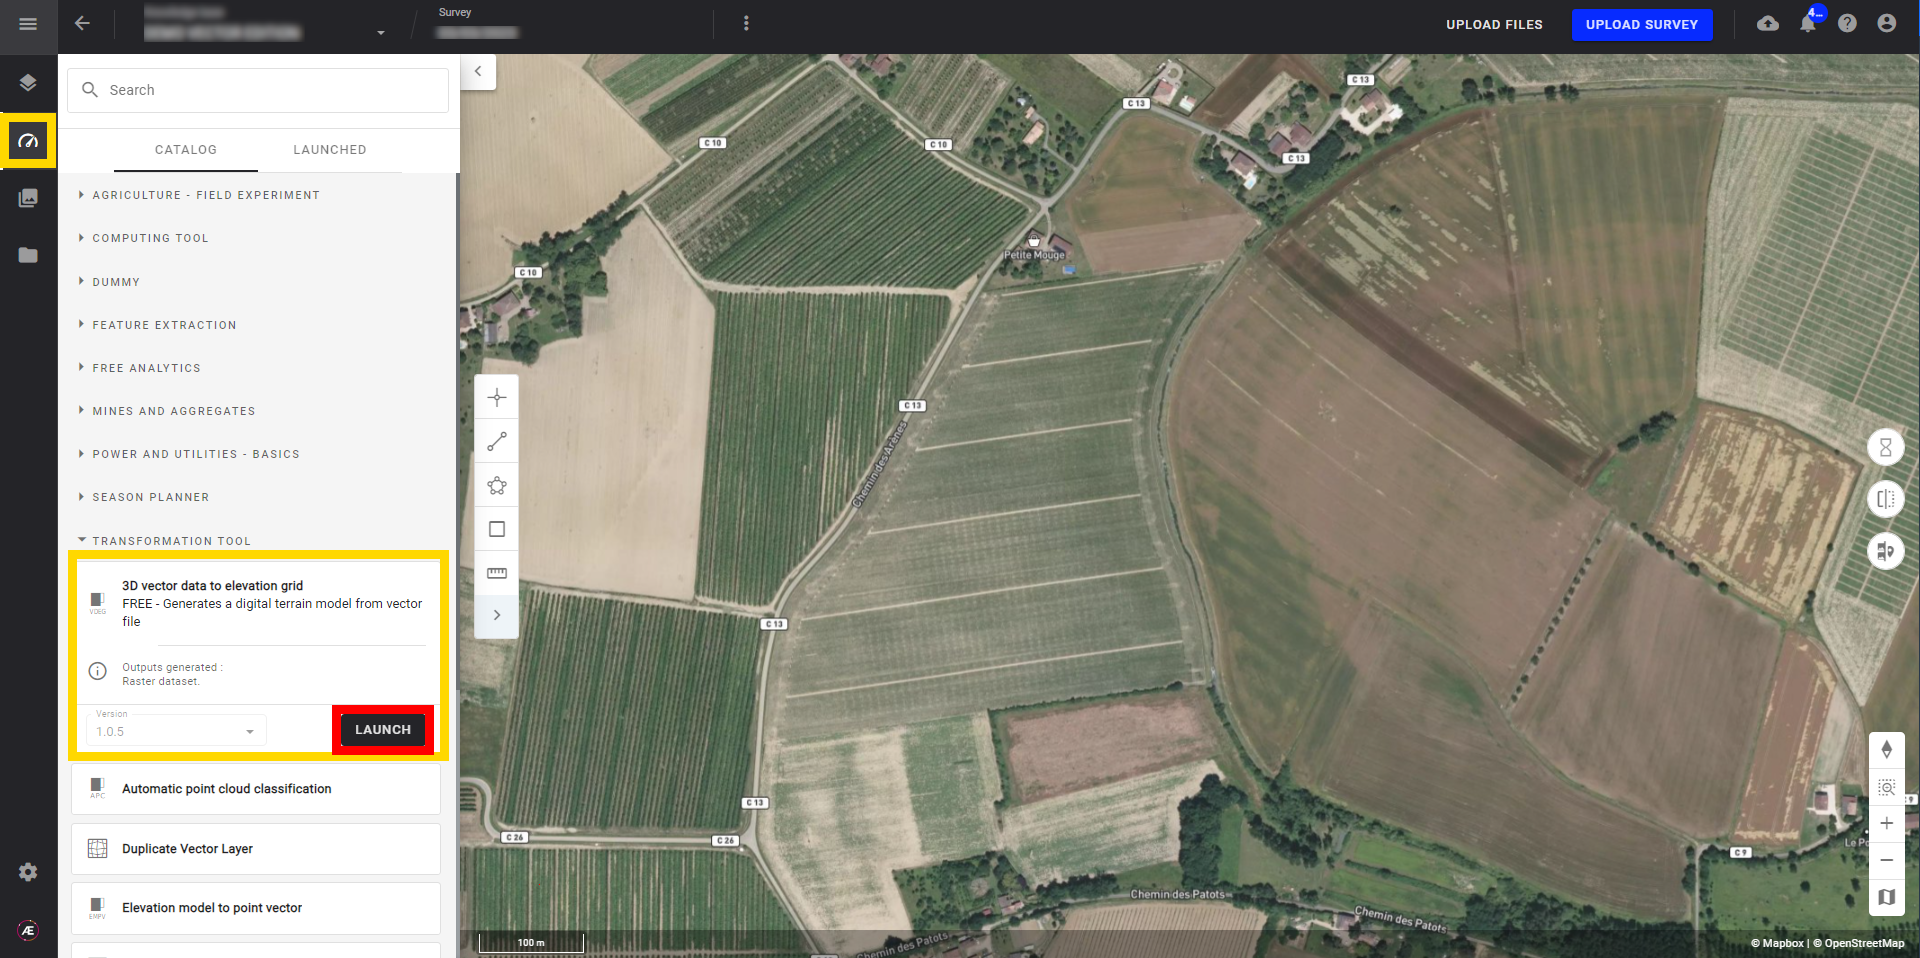
3. Launching analytics "3D vector to elevation grid"
Step 1 - In the "Analytics" tab, search and select "3D vector to elevation grid" and click on "LAUNCH".
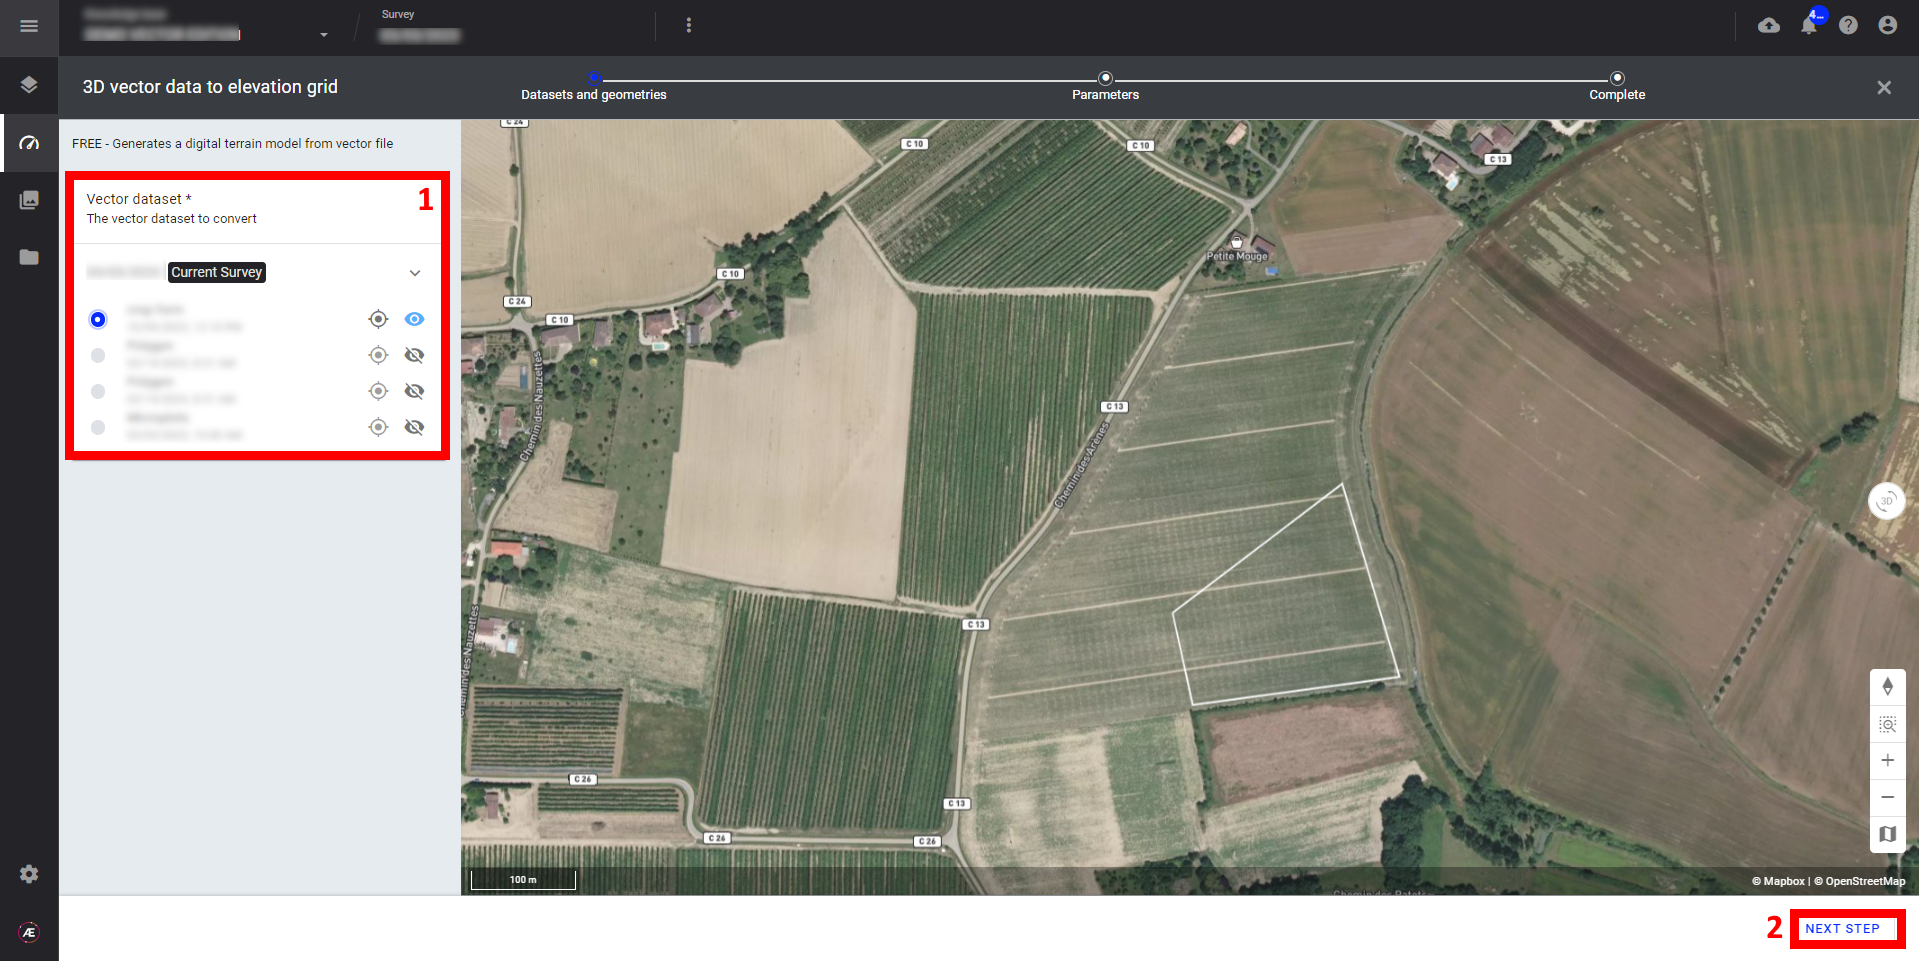
Step 2 - Select the vector (1) and click on "NEXT STEP" (2).
Step 3 - If necessary fill in the optional parameters (1) and click on "LAUNCH 3D VECTOR DATA TO ELEVATION GRID" (2):
- Deliverables suffix (optional): you can fill in a suffix to be applied to the deliverable name.
- DTM resolution (optional): you can define the size of the pixel at which the outputs will be subsampled.

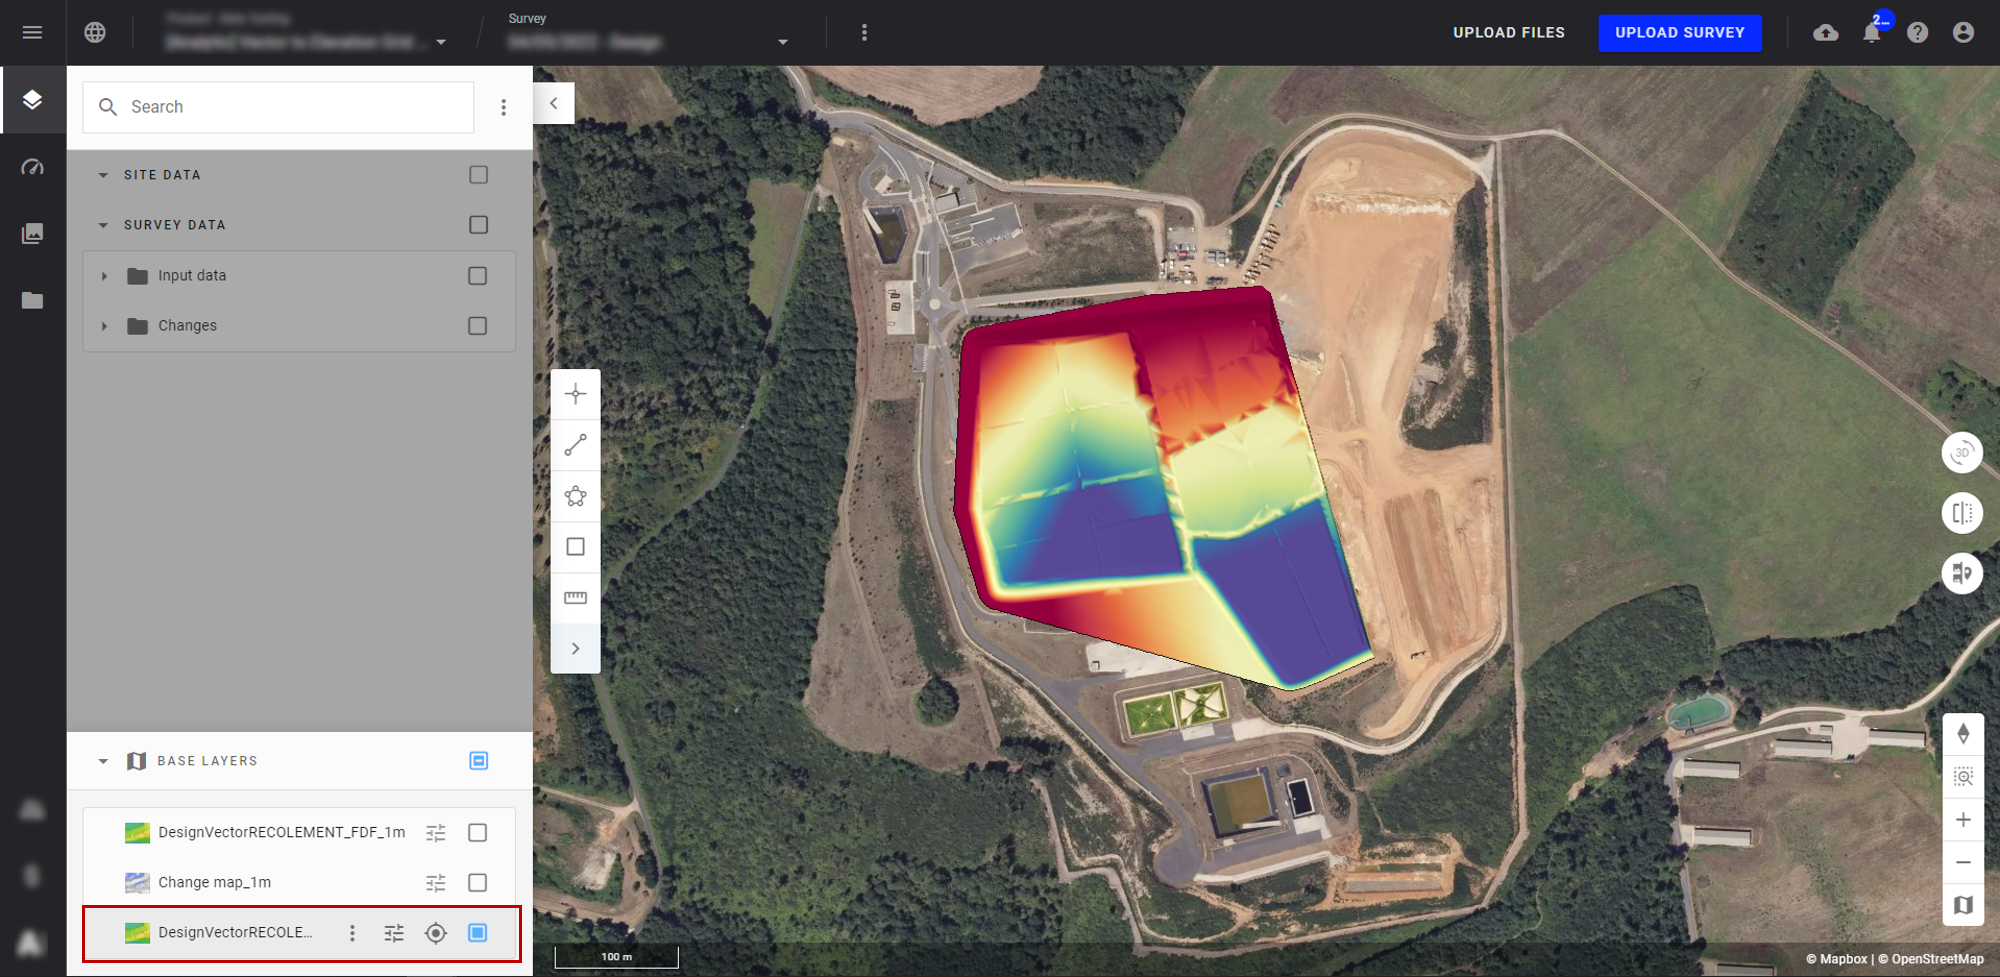
4. Result
- The elevation grid will be available in the Base Layers section and the “Download” menu.
- The DSM is generated according to your project CRS.
Note
If it hasn't been defined yet, the outputs will be projected on the local WGS84 / UTM zone.
5. Deliverable
The elevation grid will be available in the “Download” menu.
