Data Acquisition - Tasks Management

1. Data Acquisition task creation

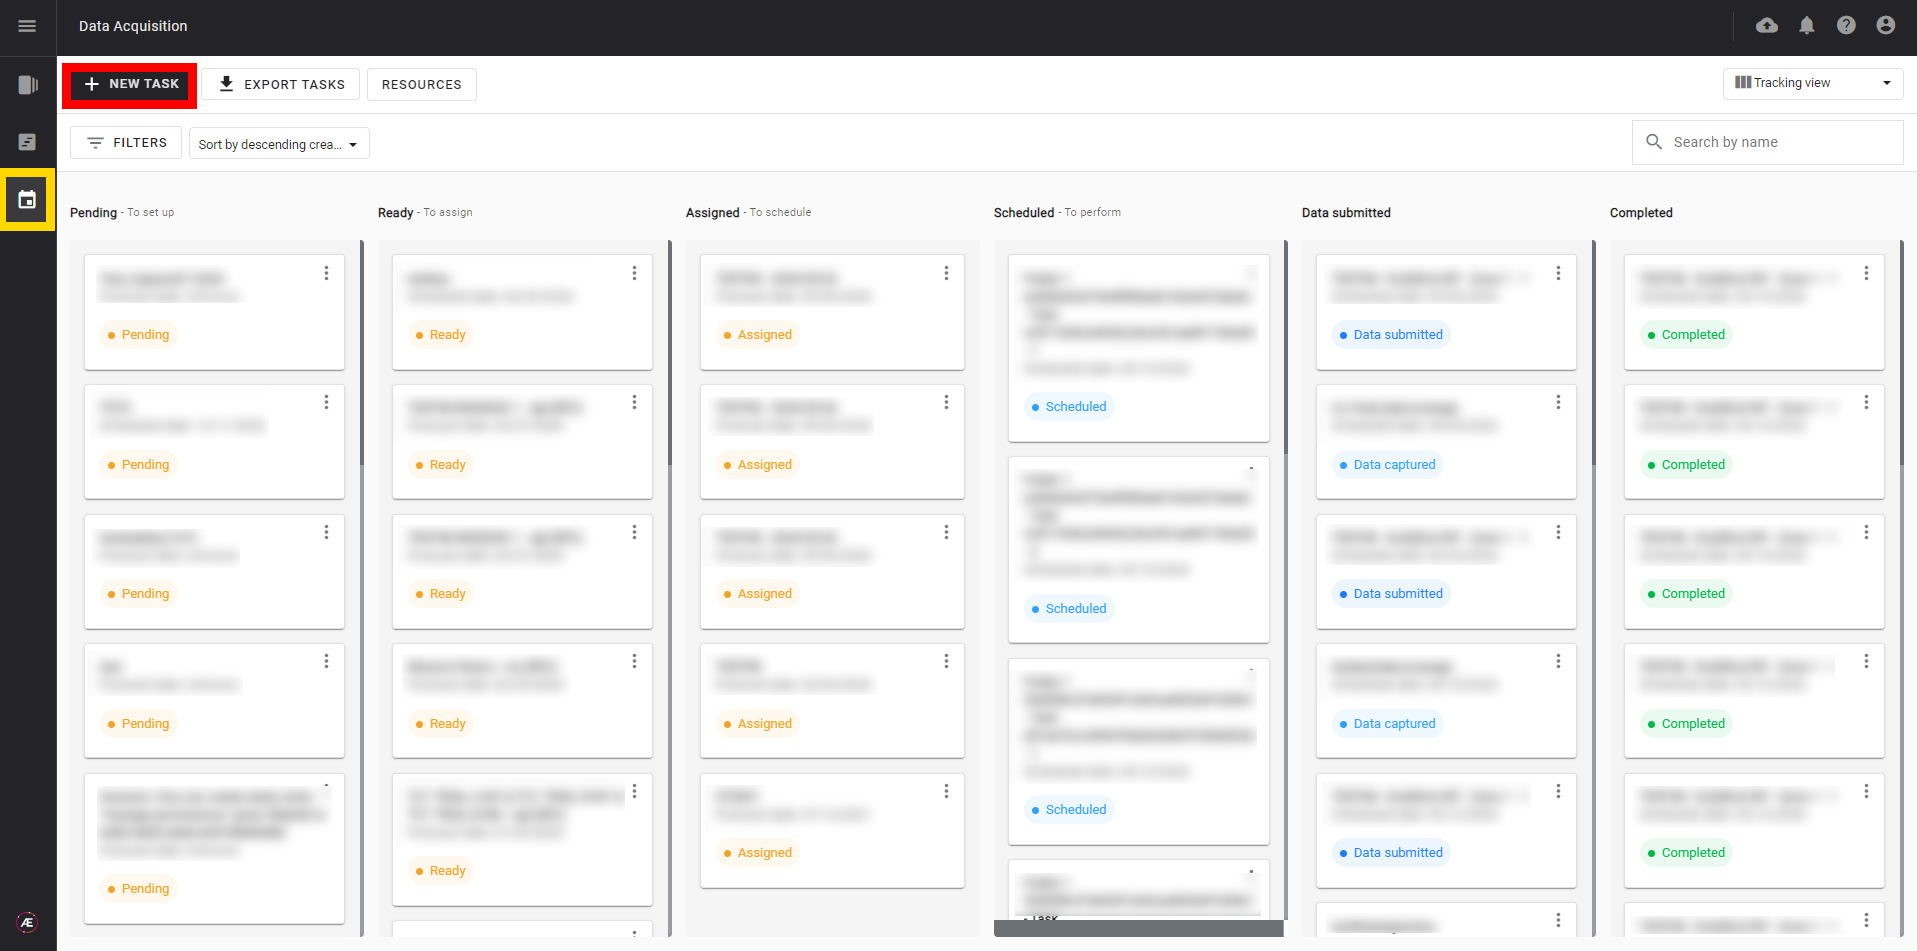
Step 1 - Click on "+ NEW TASK" in the Task Manager to create a new task from scratch in the Data Acquisition Module.
 

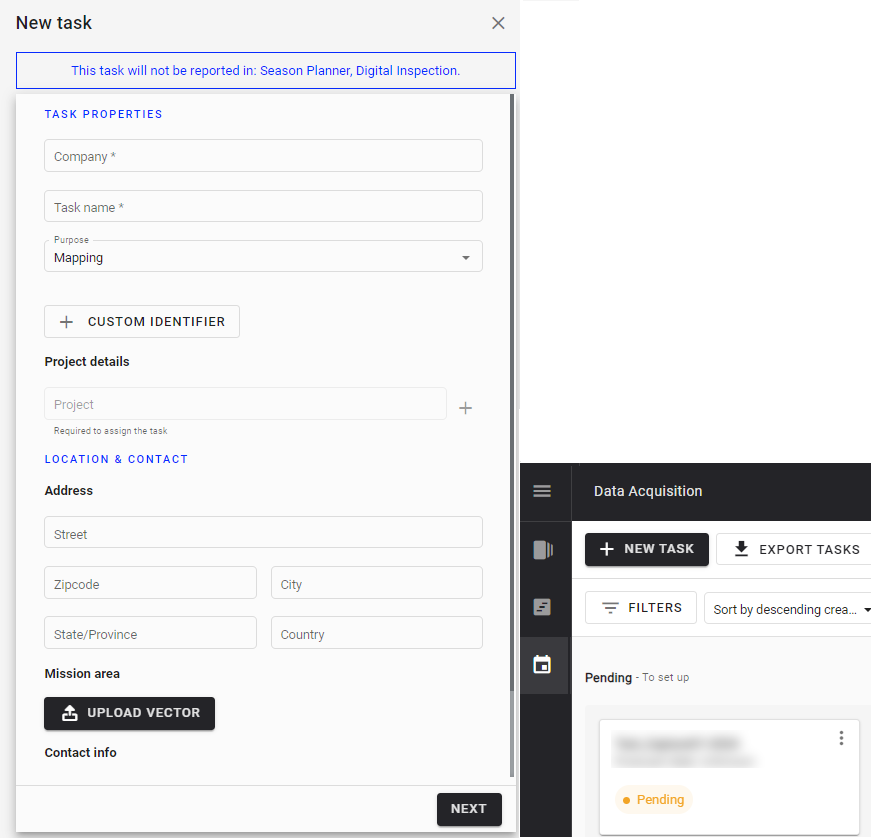
Step 2 - Indicate the different information related to the Data Acquisition task, at this stage, the minimum information required is the corresponding Company and the Task name. The new task created appears in the "Pending" section of Data Acquisition.
 

Info

  • For tasks generated from the Season Planner module, the task automatically gets the status "Ready".
  • A message is displayed during the task creation indicating that this task will not be rescheduled in the Season Planner
  • The tasks generated from the Season Planner have the suffix “[SPL]”.


2. Filter and Sort

Users can filter or sort the Data Acquisition tasks with the 2 following buttons.

  •  Filters


  • Sort


3. Task workflow

  • There are multiple task statuses in the Data Acquisition Module. The user has to edit the task and complete the required information to move from one status to another.
  • To edit a task, click on the three dots menu of the task and "Edit". 

  • There is some required information to move a task from one status to another:

3.1 From Pending to Ready

  • Give a name to the task.
  • Select the project if there is an existing one or create one directly from the task.
  • Define the Forecast mission date.

3.2 From Ready to Assigned

  • Select the Team and Pilot that will perform the task.

Active pilots only

Only active pilots can be selected, blocked pilots are not visible.


3.3 From Assigned to Scheduled

  • Schedule the mission.

3.4 From Scheduled to Data Captured

  • The condition for moving a task to the status “Data Captured” is to fill in the field report.
  • When the task has the “Data Captured” status, it is visible on the task label.

3.5 From Data Captured to Data Submitted

  • The user or the pilot has to upload the data from the mission.

Important

The type of requested data set/input depends on two settings selected at the Data Acquisition task creation:

  • TASK PROPERTIES section: Purpose (Mapping or Raw or 3D Modeling).
  • COLLECTION REQUIREMENT section: Sensor type.
 

3.6 From Data Submitted to Completed

  • The Data Acquisition task is validated.

4. Tasks settings 

4.1 Settings

The two following settings of the Data Acquisition task will define the required inputs at the end of the workflow.


Info

If the Data Acquisition task is created from the Season Planner, the collection requirement will be filled automatically after the task creation.


4.2 Sensor Type/Purpose

The table below shows the requested datasets according to the settings defined in the task.

Sensor Type / Purpose Mapping 3D modelling  Raw
RGB
Raw images OR
Orthomosaic
DSM
Point Cloud
3D Model
Raw images OR
Orthomosaic
Point Cloud
3D Model
Raw images
Multispectral
Raw images OR
Reflectance map
DSM
Not configured Not configured
Hyperspectral Reflectance map Not configured Not configured
Thermal
Raw images OR
Thermal map
DSM
Not configured Not configured

Lidar

Point Cloud Not configured Not configured

4.3 Custom identifiers (specific for Agriculture)

  • Custom Identifiers are additional labels to identify tasks in the module. 
  • Custom identifiers can be added, deleted, or edited during task creation or edition as shown in the following images.

  • The available ID types are:
    • Crop
    • Field
    • Trial
    • Growth Stage
  • It is also possible to visualize them by hovering on the task in the tracking view.


Info

Some custom identifiers can be prefilled if the task has been generated with the Season Planner Module.


WARNING

  • Do not delete the custom identifiers of a task linked to the Season Planner module. 
  • If the custom identifiers are deleted, the analyses in the Season planner could be impacted.
 

4.4 Flight parameters

It is possible to indicate the flight parameters required.

Several parameters are proposed depending on the sensor type.

RGB

  • Height Above ground level or Ground sampling distance
  • Flight speed
  • GPS accuracy
  • Camera rotation - tilt
  • Camera rotation - pan
  • Min distance to equipment
  • Max distance to equipment

Multispectral

  • Height Above ground level or Ground sampling distance
  • Flight speed

Hyperspectral

  • Height Above ground level or Ground sampling distance
  • Flight speed

Thermal

  • Height Above ground level or Ground sampling distance
  • Flight speed
  • Overlap forward
  • Overlap lateral

Lidar

  • Height Above ground level
  • Flight speed
  • GPS accuracy 
  • Points density 
  • Number of echos


5. Task deletion

Info

Deleting a task linked to Season Planner will remove the link between the Data Acquisition task and Season Planner task. In the Season Planner, the task will have the status “No capture task” and the button “VIEW TASK” will no longer be displayed.  It will be necessary to generate the capture task again from the season planner (see Season Planner - Creation of Data Acquisition Tasks).


5.1. Unitary task deletion

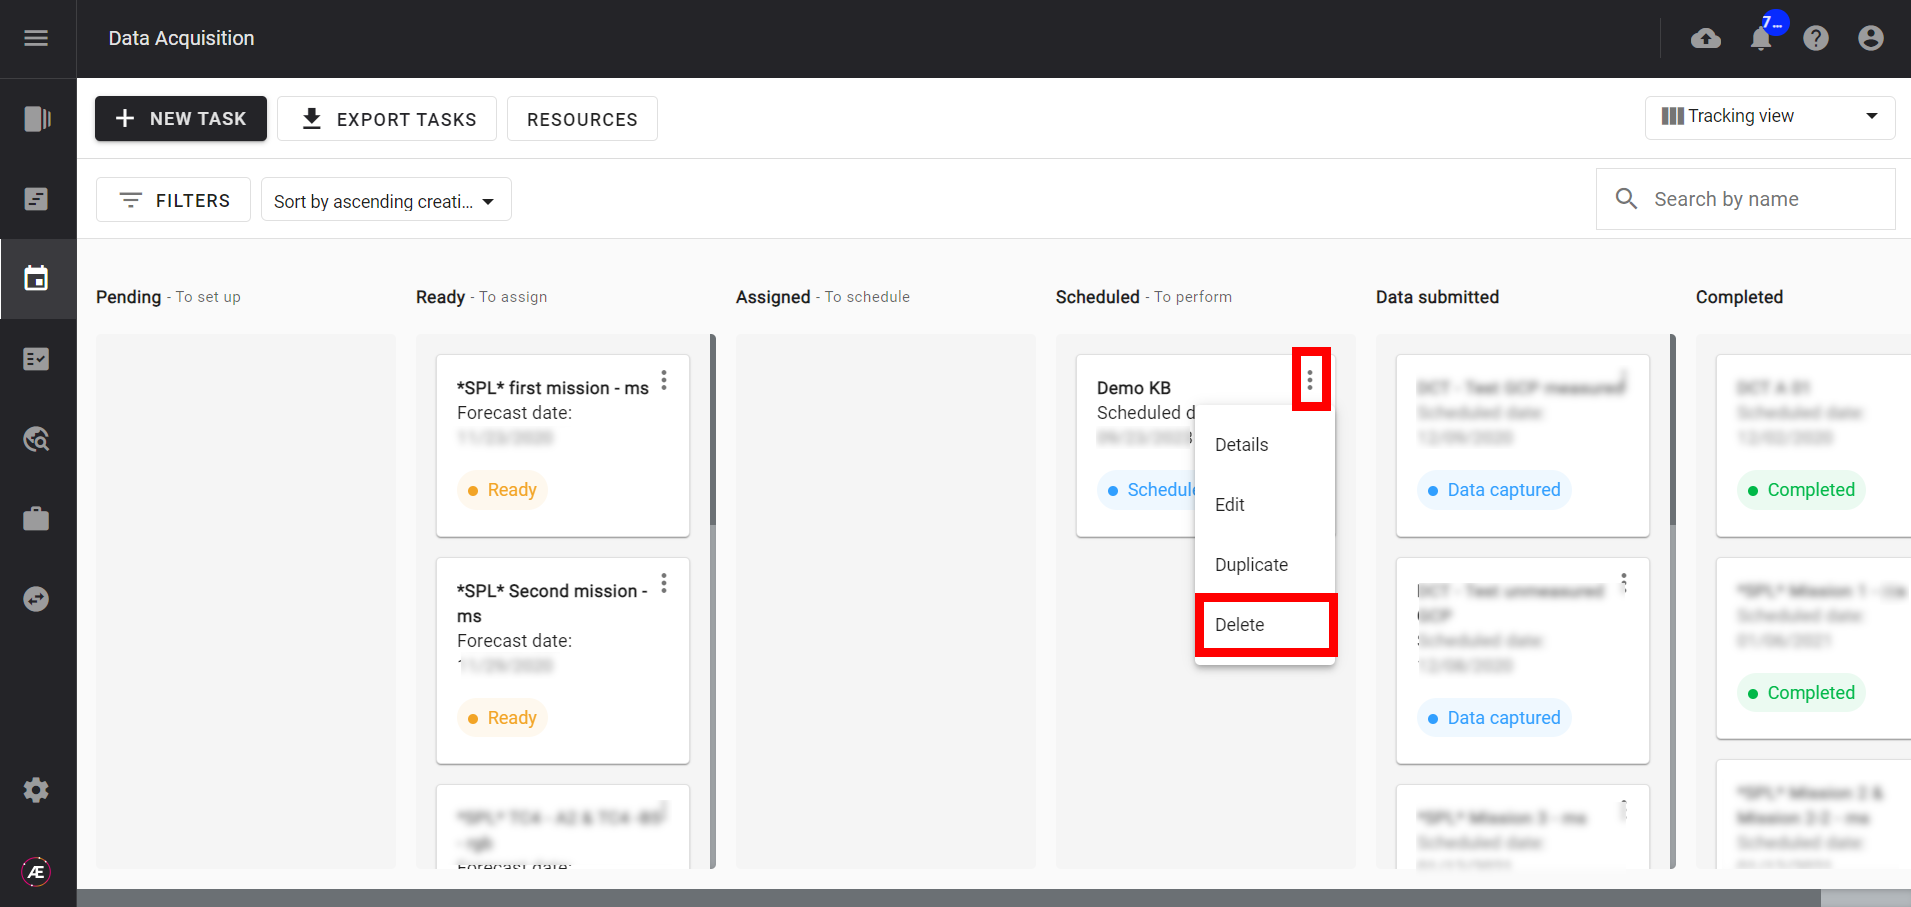
From any view, use the 3 dots menu of the desired task and click on "Delete".
 

5.2. Bulk task deletion

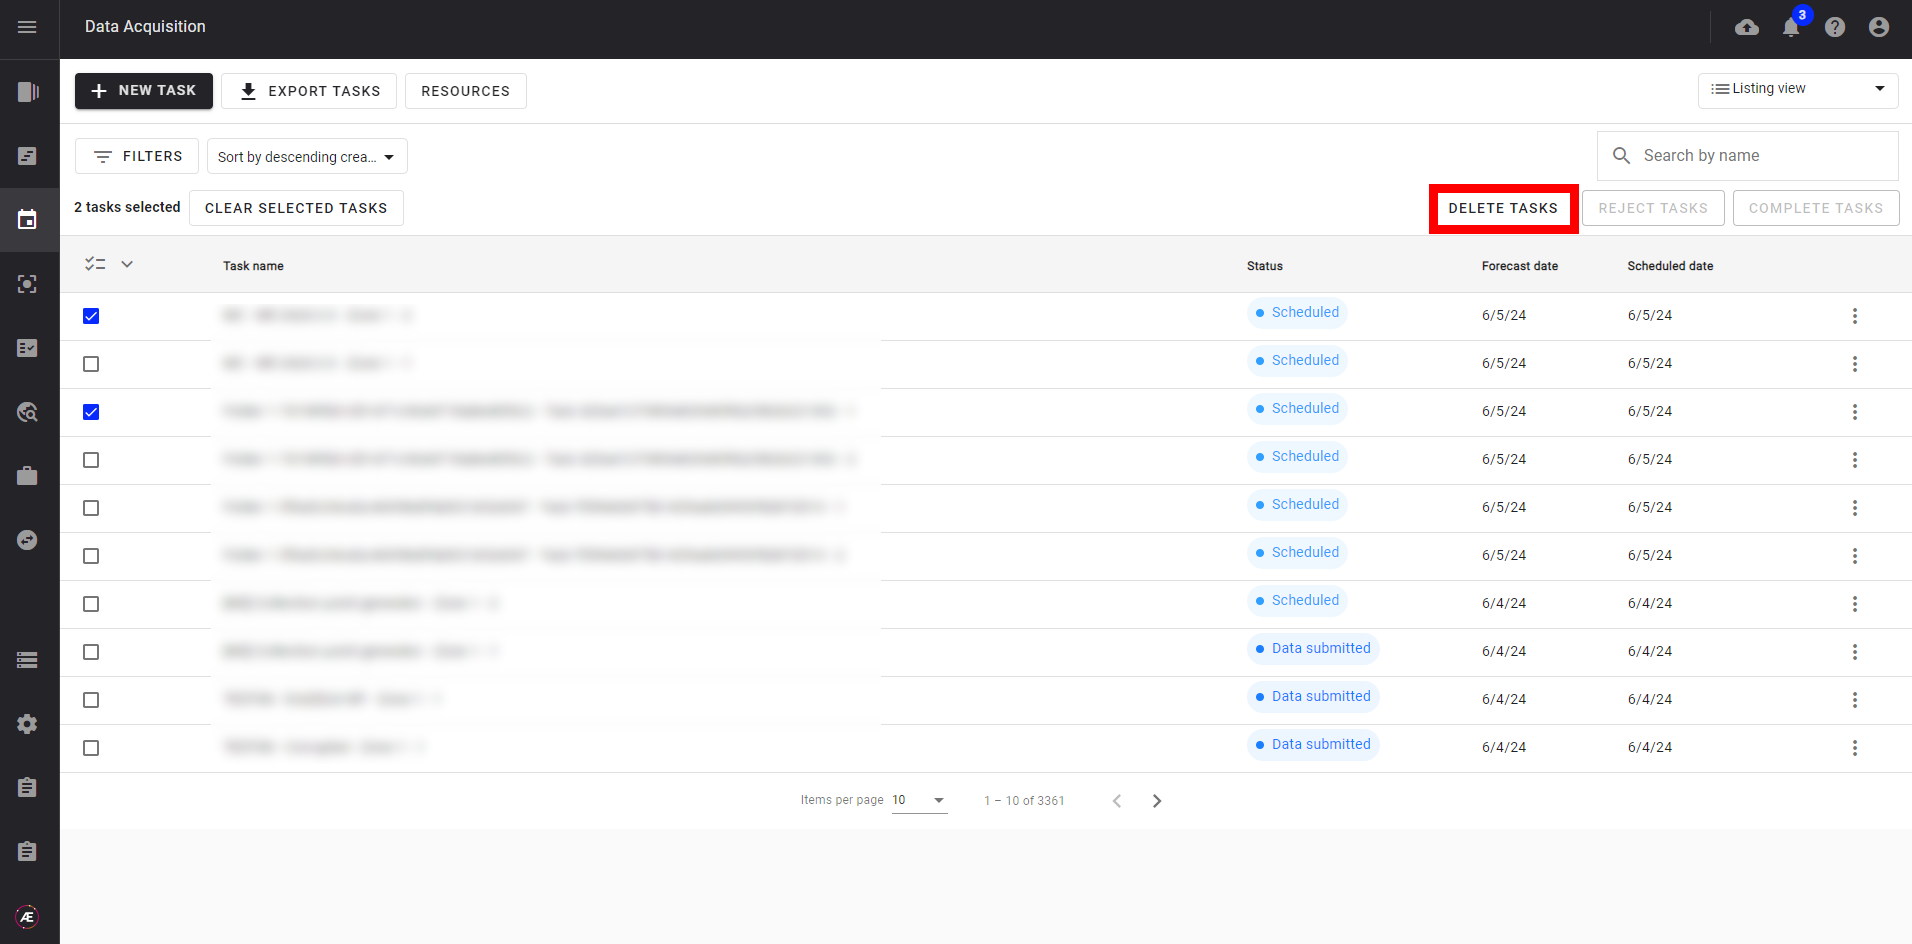
In the Listing view, select the tasks you want to delete and click on "Delete tasks".
 

6. Task rejection

6.1. Unitary task rejection

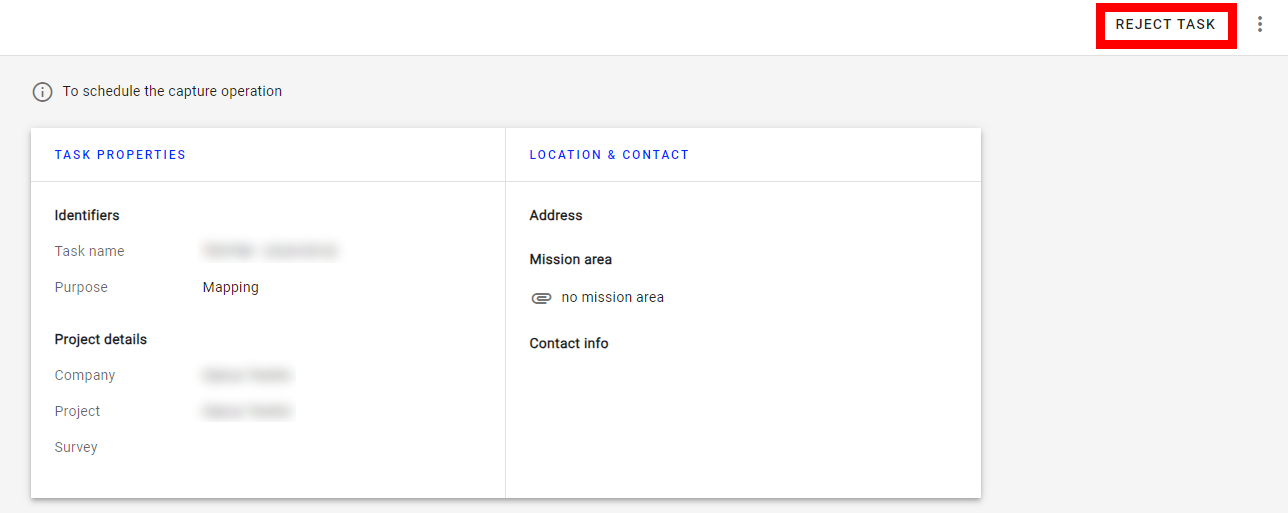
Click on “REJECT TASK” from the task details page (in "Assigned" status").
 

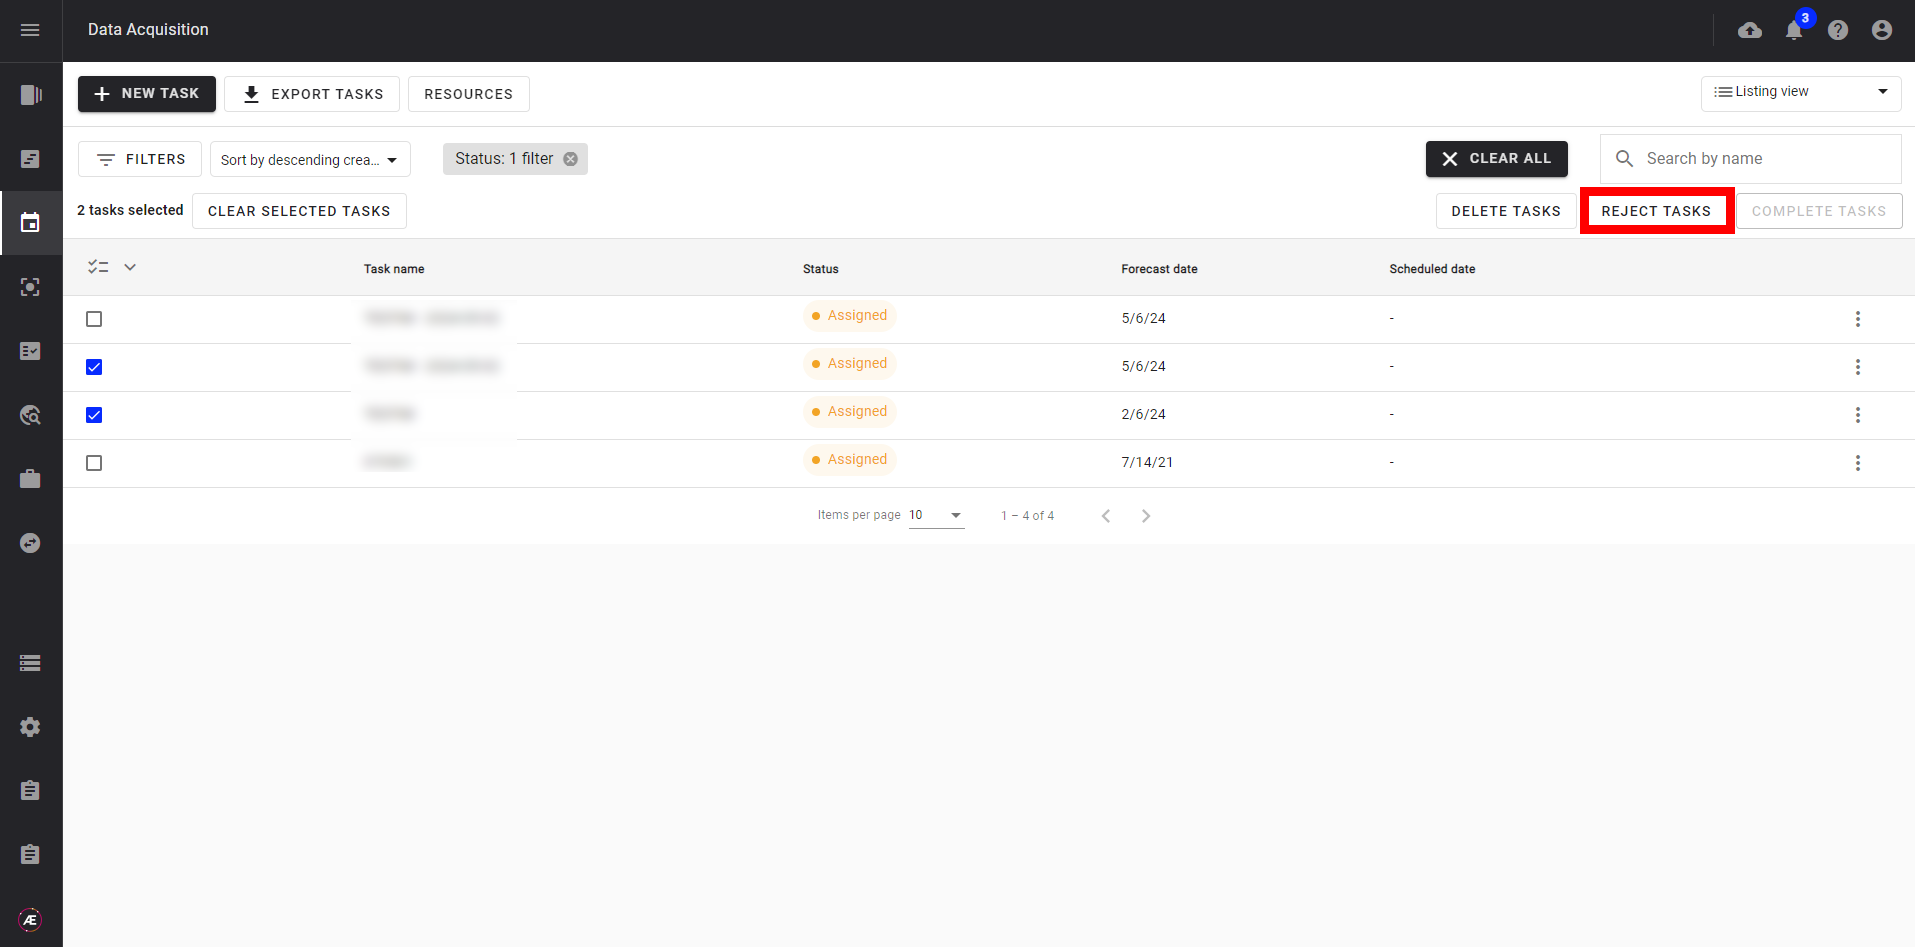
6.2. Bulk task rejection

In the Listing view, select the desired tasks (in “Assigned” status) and click on "Reject tasks".
 

7. Export of tasks

It is possible to export some tasks in the CSV file.

The CSV file will contain a great number of task properties, as well as some coverage metrics:

  • Covered mission area (%): percentage of the mission area covered by the task dataset of reference (for mission area of type linestring, multilinestring and polygon)
  • Covered mission length (m): length of mission area covered by the task dataset of reference (if the mission area is of type linestring or multilinestring)
  • Uncovered mission length (m): length of the mission area uncovered by the task dataset of reference (if the mission area is of type linestring or multilinestring)
  • Covered mission surface (m²): surface of the mission area covered by the task dataset of reference (if the mission area is of type polygon)
  • Uncovered mission surface (m²): surface of the mission area uncovered by the task dataset of reference (if the mission area is of type polygon)


Task dataset of reference

For tasks where the purpose is “mapping” and the sensor type is “RGB”, the metrics are extracted from the Orthomosaic map

For tasks where the purpose is “mapping” and the sensor type is “Multispectral” or “Hyperspectral”, the metrics are extracted from the Reflectance map

For tasks where the purpose is “mapping” and the sensor type is “Thermal”, the metrics are extracted from the Thermal map

For tasks where the purpose is “mapping” and the sensor type is “Lidar”, the metrics are extracted from the Point Cloud

For tasks where the purpose is “3d modelling” and the sensor type is “RGB”, the metrics are extracted from the Orthofaçade

For tasks where the purpose is “raw” : no metrics provided


7.1. General export of tasks

To export the first 1000 tasks (without any task selection), click on "Export tasks" from any view (Tracking, Calendar or Listing)

After a while (export duration depends on the number of tasks), the export is generated in CSV format.

It complies with the tasks which correspond to the filter/sorting options. Only the 1000 first tasks resulting from this search, are extracted.


7.2. Export a selection of tasks

In the Listing view, select the desired tasks and click on "Export tasks".

After a while (export duration depends on the number of tasks), the export is generated in CSV format.


Knowledge Base Software powered by Helpjuice