Calcul de Volume
1. Description
Aether permet de calculer rapidement le volume en référençant des couches de base raster telles que le modèle numérique de surface (ou DSM). Examinons par exemple le processus de calcul du volume d'un stock.
2. Fichiers d’entrée
Un fichier raster DSM, généré par le processus de photogrammétrie, est nécessaire afin de réaliser des calculs de volume.
3. Workflow
Il existe plusieurs façons de calculer un volume sur la plateforme.
3.1 À partir de l'outil de mesure
Cette méthode est la plus rapide et ne crée pas d'annotation sur la plateforme.
Étape 1 - Cliquez sur le bouton "MEASURE" (1) puis sur "AREA & VOLUME" (2).
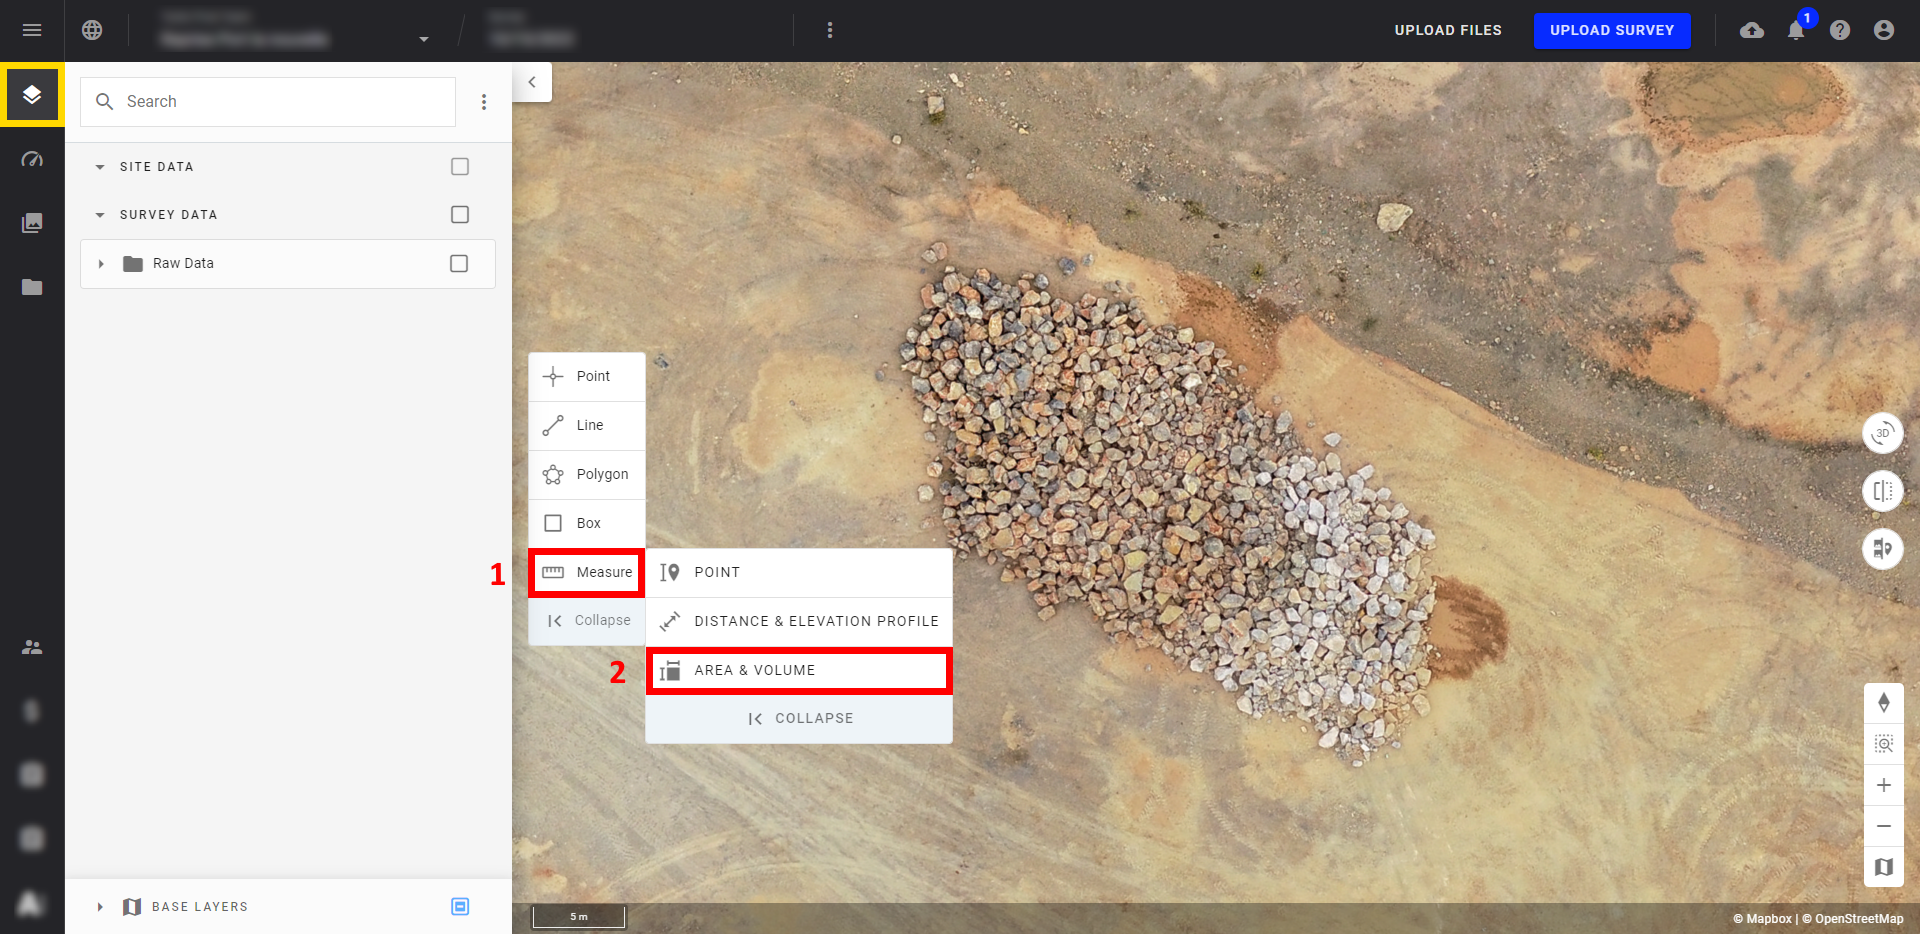
Étape 2 - Dessinez un polygone autour de la zone que vous souhaitez mesurer.
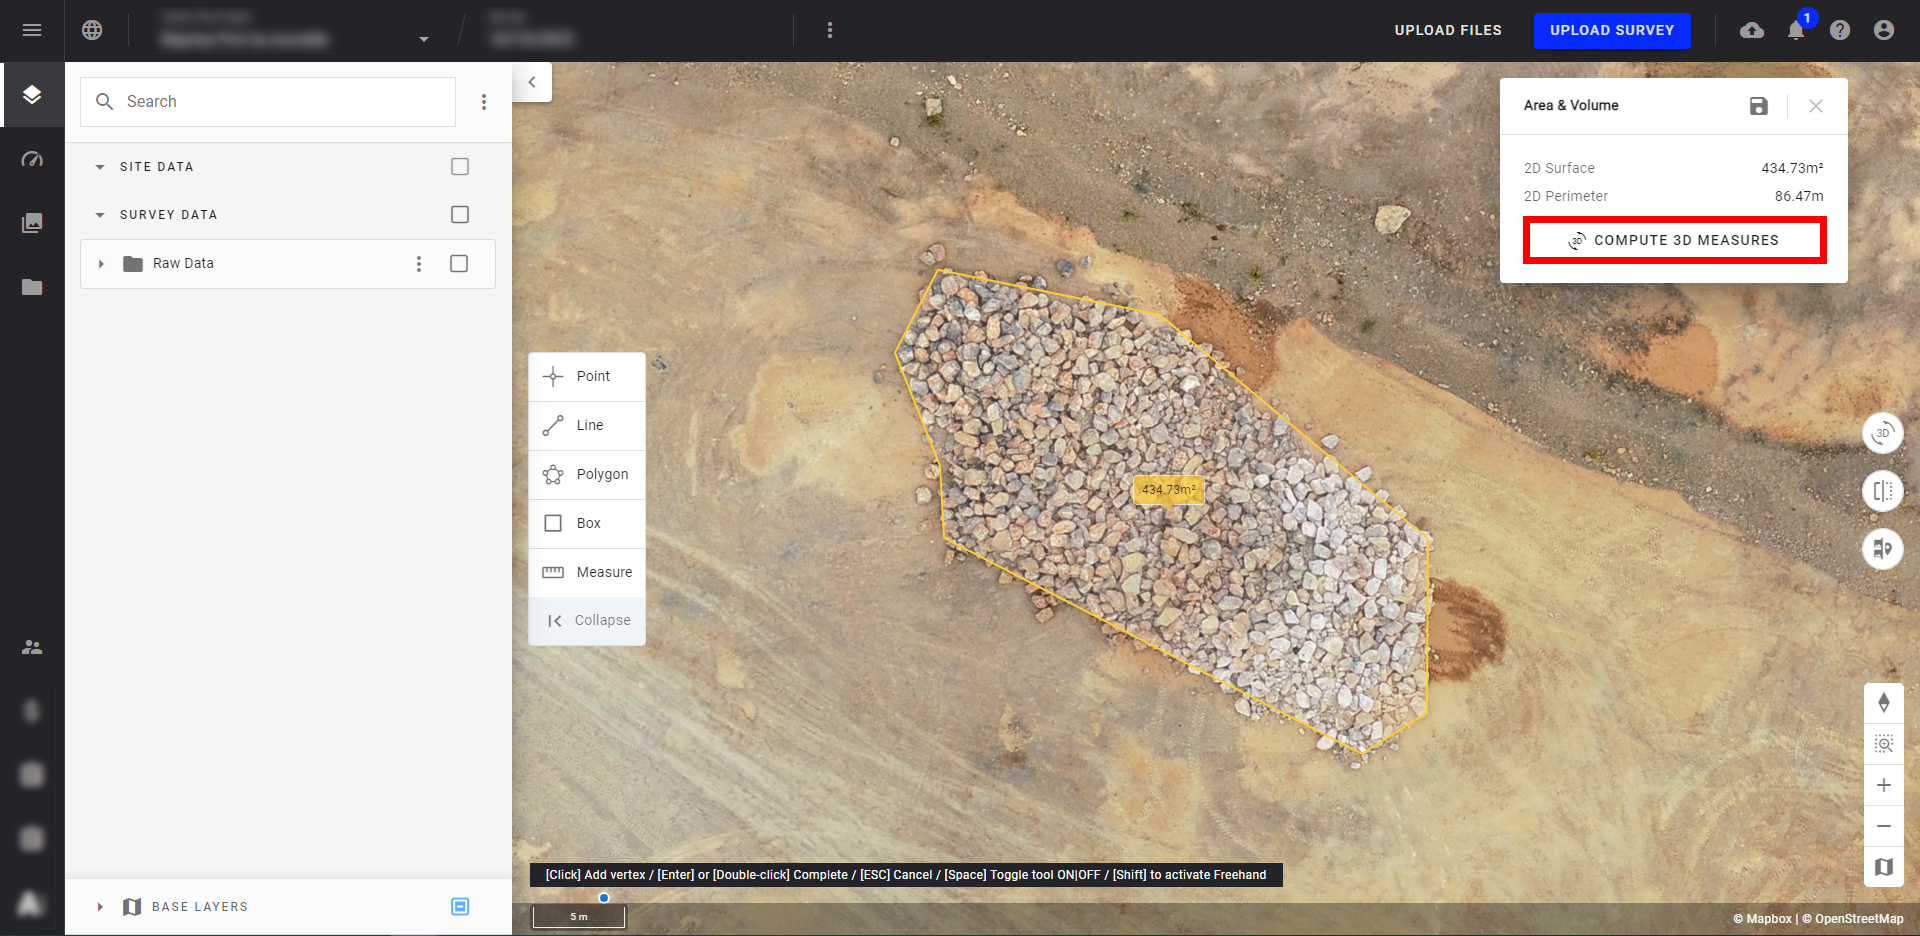
Étape 3 - Dans la fenêtre pop-up qui apparaît, cliquez sur "COMPUTE 3D MEASURES".
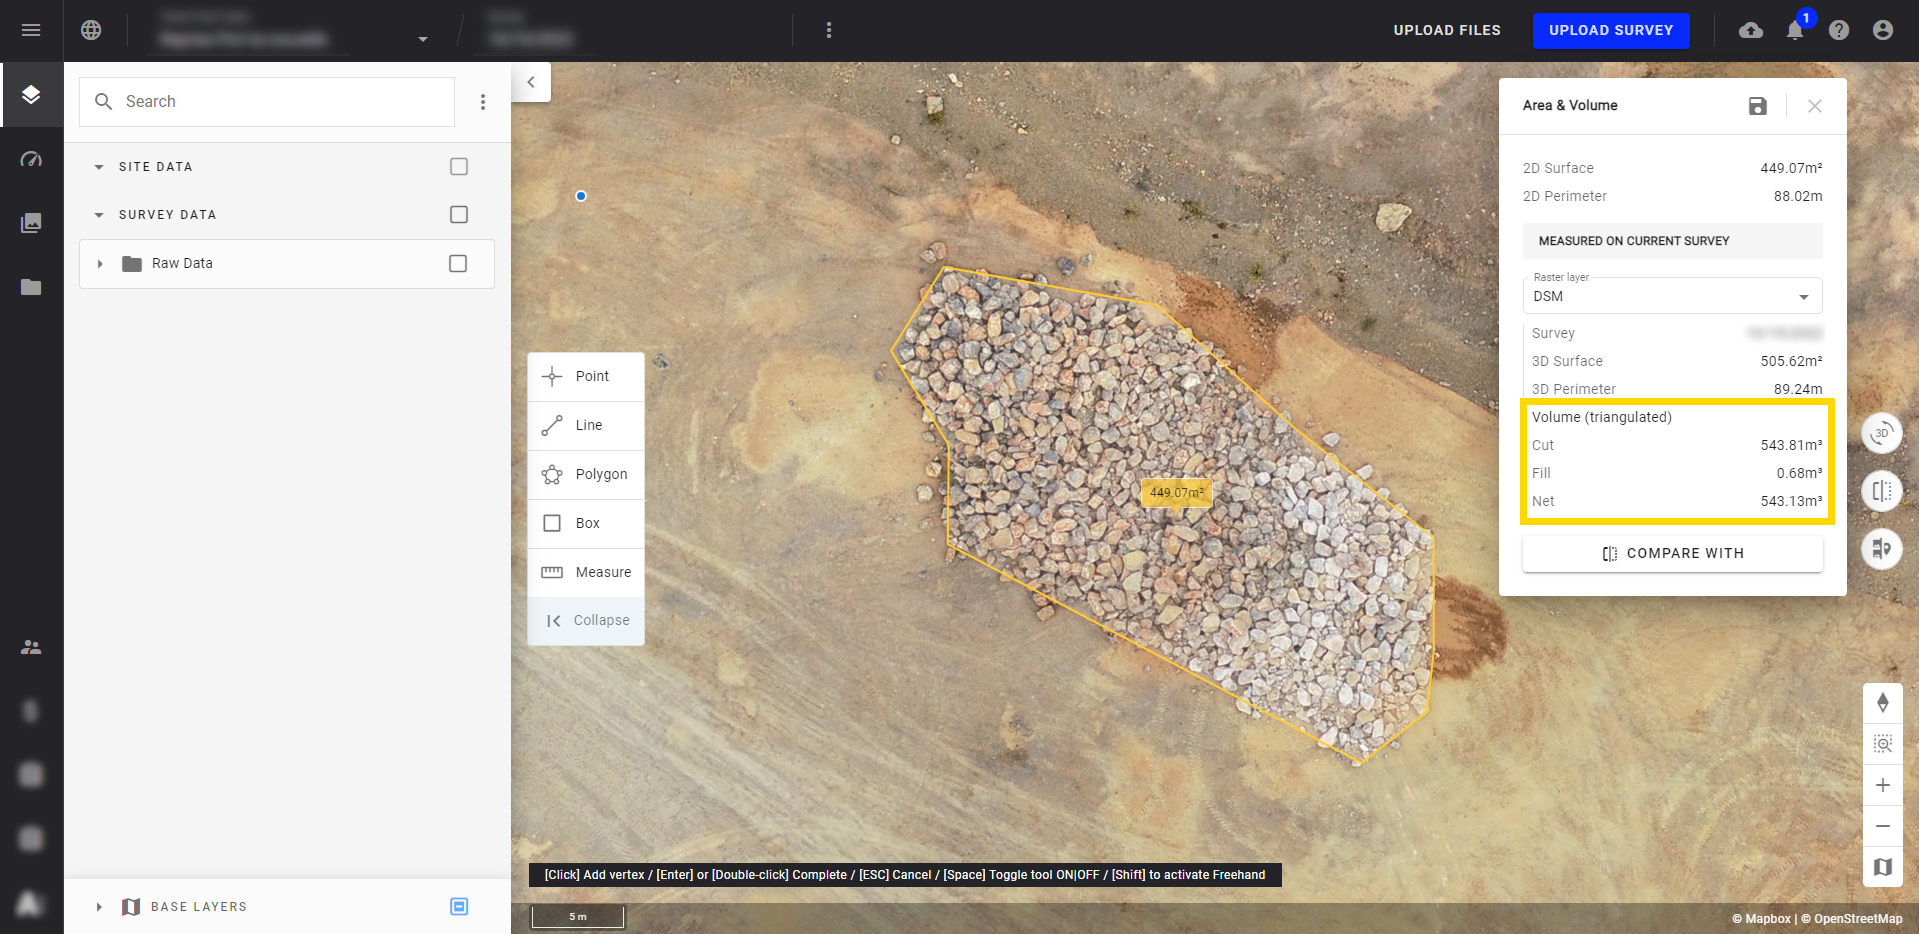
Étape 4 - Les résultats du calcul du volume sont affichés dans la partie encadrée en jaune de la fenêtre pop-up. Pour plus d'informations, passez au paragraphe 4.
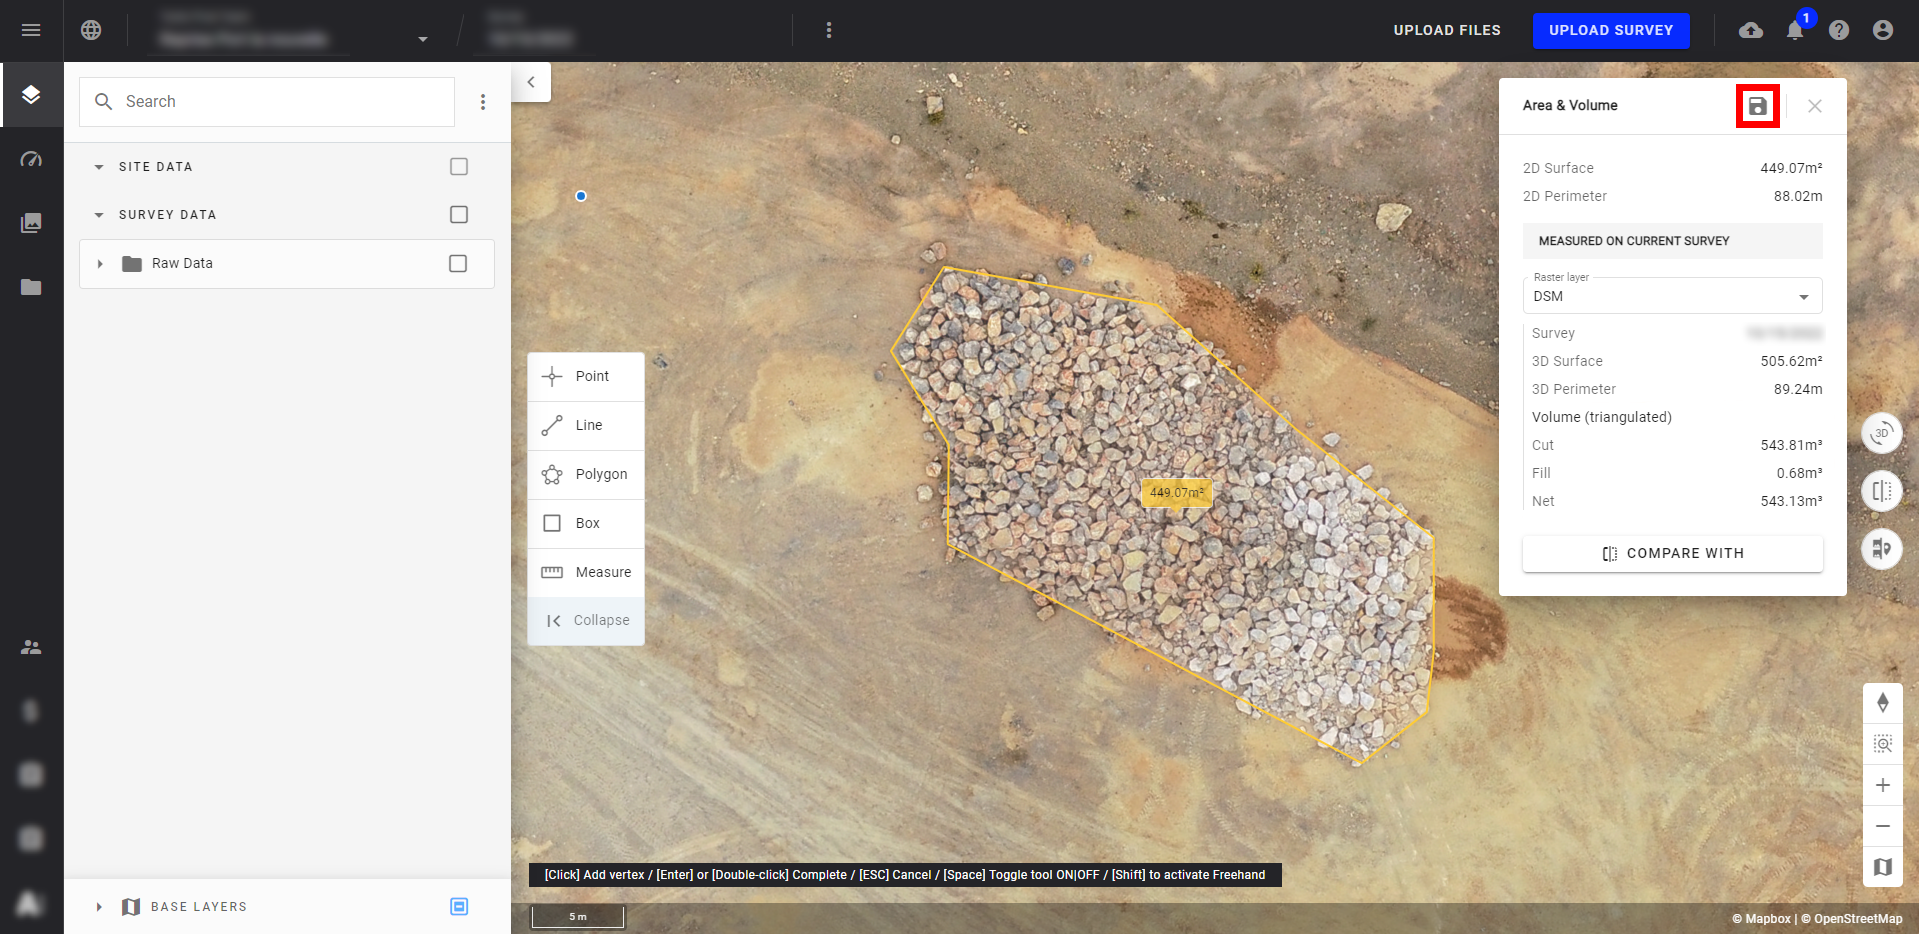
Pour plus d'informations, voir Création et Modification des Annotations.
3.2 À partir d'une annotation de polygone
Cette solution offre un large choix de méthodes de calcul de volume détaillées ci-dessous.
Étape 1 - À partir de l'onglet des couches du menu du projet, sélectionnez la couche de base souhaitée et effectuez un zoom sur la zone d'intérêt.
Étape 2 - Dans la la barre d'outils d'annotation, sélectionnez l'icône de polygone (encadrée en rouge) et dessinez une annotation de polygone sur votre couche 2D.
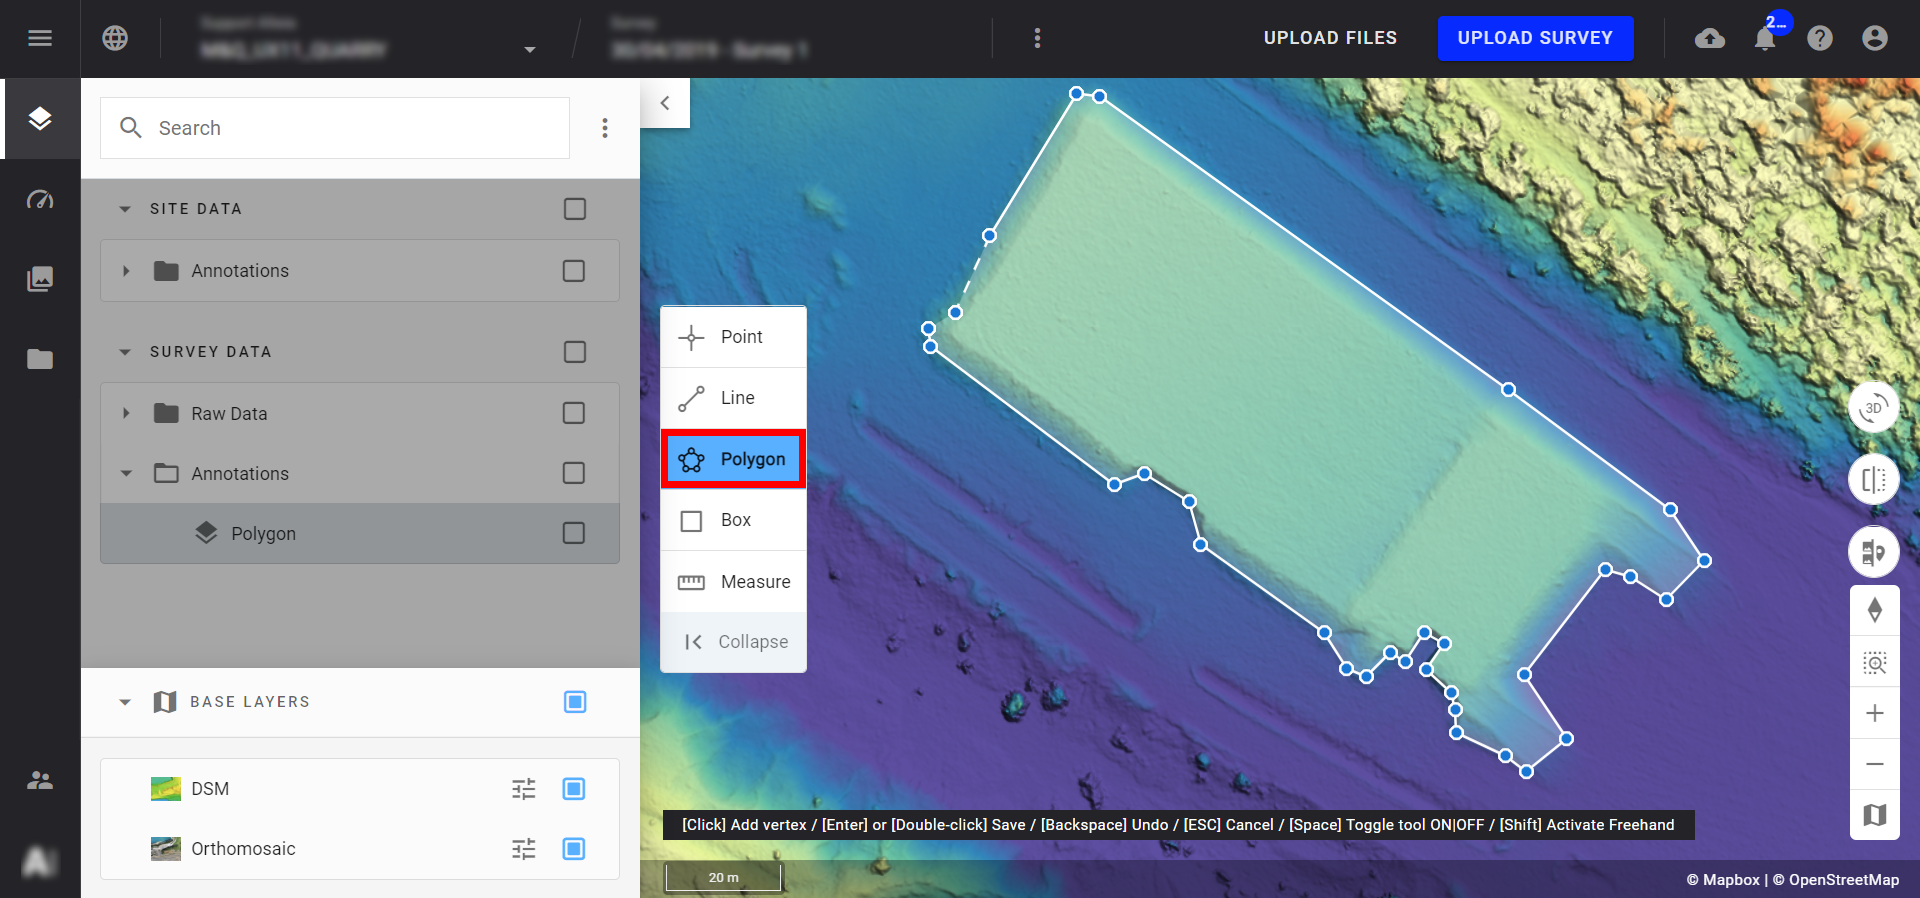
Étape 3 - Une fois que le polygone est terminé, effectuez un double-clic sur le dernier point pour l'enregistrer.
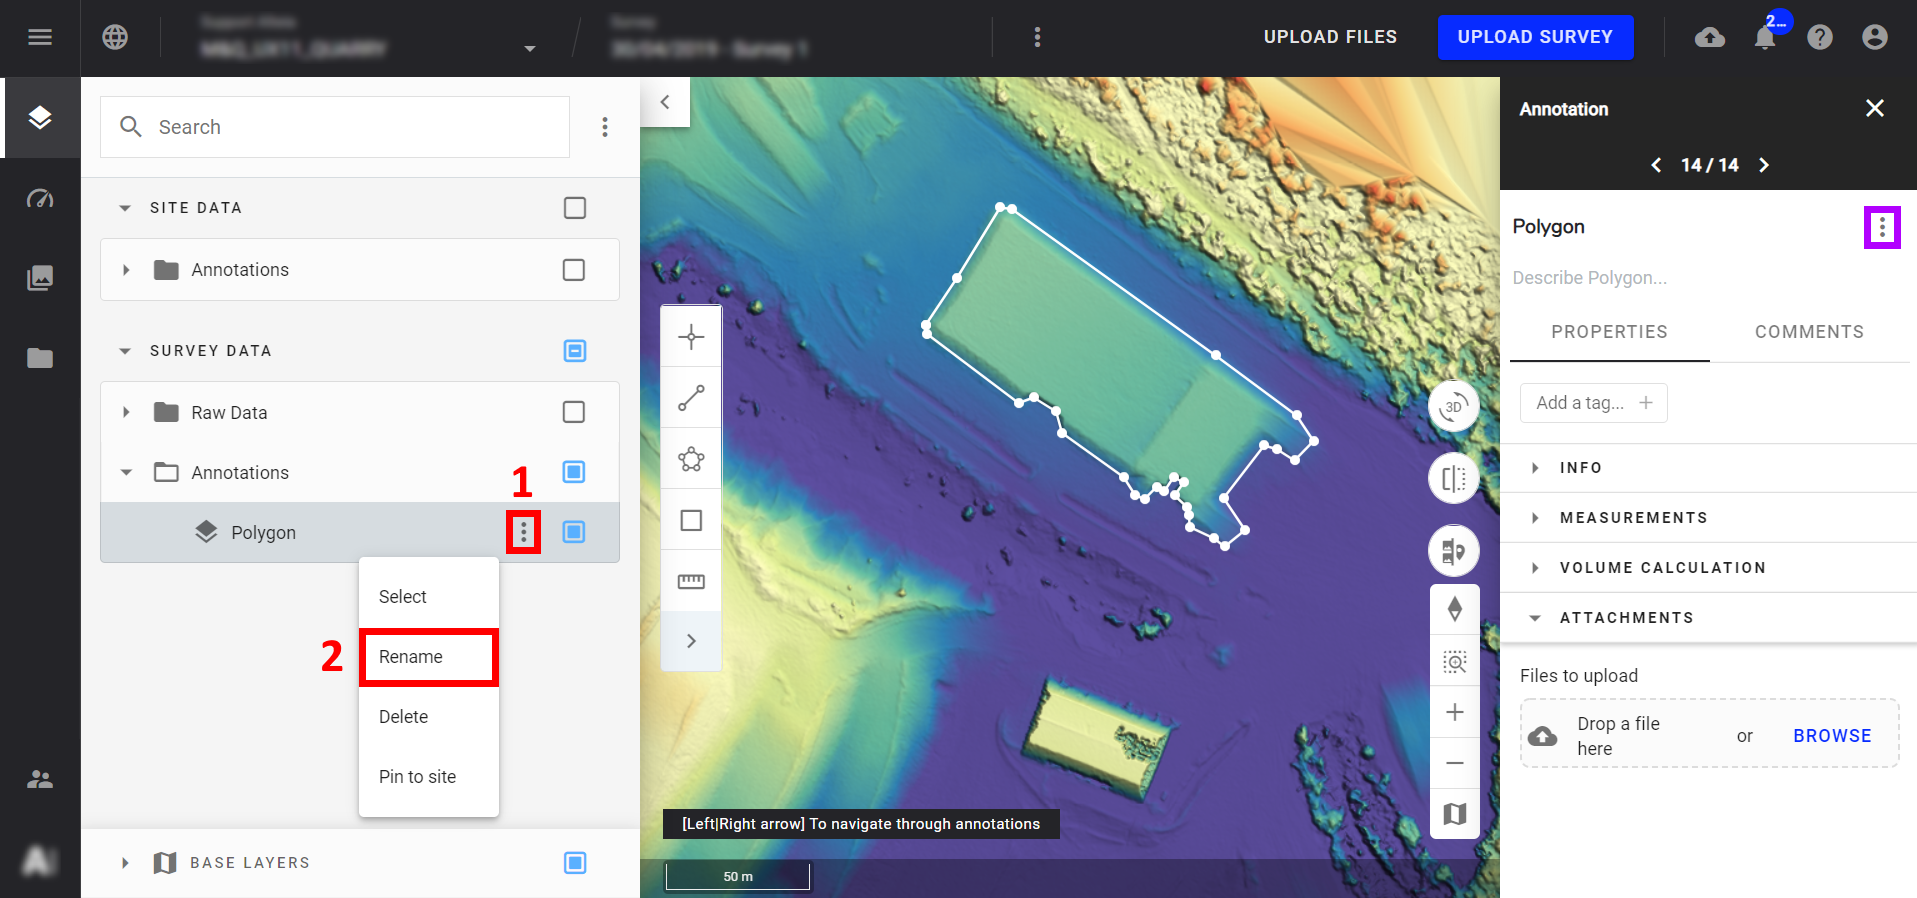
- Pour rouvrir le panneau d'information à tout moment, sélectionnez le polygone sur la carte.
- Vous pouvez également déplacer votre annotation vers n'importe quel fichier de la section de votre choix ("PROJECT DATA" ou "SURVEY DATA"), voir Parcourir et Organiser les Calques.
Etape 4 - Une fois ces opérations terminées, sélectionnez "Volume calculations"/"Calculs de volume" dans le panneau d'information (encadré en rouge ci-dessous).
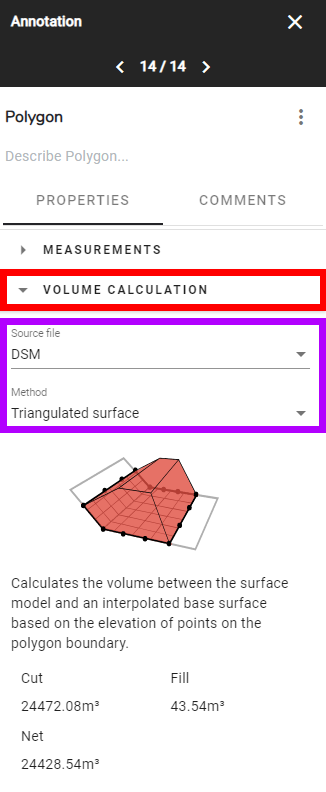
Le menu déroulant révèle les options "Source file"/"fichier source" et "Method"/"Méthode" (encadré en violet ci-dessus). Dans "Source file", sélectionnez le raster Geotiff que vous souhaitez utiliser pour calculer le volume (ici, le DSM issu de la photogrammétrie est utilisé).
En sélectionnant "Method"/"Méthode", une liste de six options s'affiche, chacune ayant ses propres méthodes de calcul et des exigences différentes. Sélectionnez la méthode que vous souhaitez. Sous la description de la méthode, des calculs apparaissent instantanément pour "Cut", "Fill", "Net" et "Lowest".
|
Nom de la Méthode |
Exemple d'Image |
Méthode de calcul |
Utilisé pour |
|---|---|---|---|
| Point le plus bas Lowest Point |
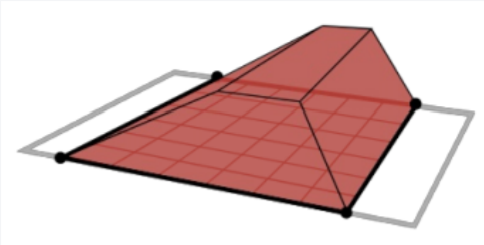 |
Calcule le volume entre le modèle de surface et un plan plat défini par le point le plus bas du polygone. |
|
| Surface Triangulée Triangulated Surface |
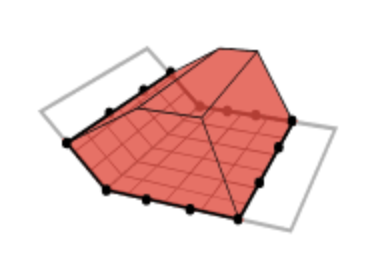 |
Calcule le volume entre le modèle de surface et une surface de base interpolée en fonction de l'élévation des points sur la limite du polygone. Il ne prend en compte que l'élévation des points qui ont été créés par l'utilisateur pour faire le polygone et interpole une surface en fonction de ces élévations. À l'intérieur du polygone, chaque volume plein au-dessus de la surface est ajouté à la valeur de coupe, tandis que chaque volume vide sous la surface est ajouté à la valeur de remplissage. |
|
| Plan de Meilleur Ajustement Best Fit Plane |
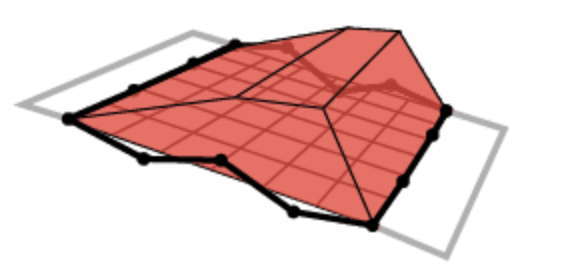 |
Ajuste un plan plat en minimisant la distance entre les points sélectionnés et le plan. |
|
| Valeur Z Configurable Configurable Z value |
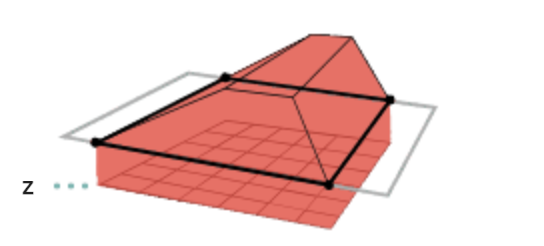 |
Calcule le volume entre le modèle de surface et le polygone sélectionné en fonction d'un décalage de plan plat. |
|
| Épaisseur Constante Constant thickness |
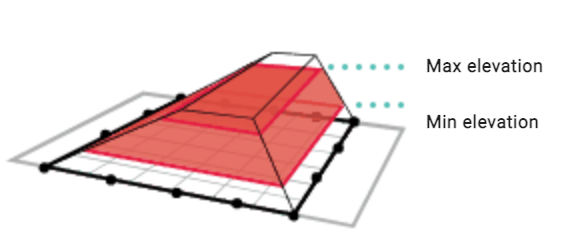 |
Calcule le volume entre deux plans plats sur la base des élévations saisies. |
|
| Différentielle Differential |
.png) |
Calcule le volume entre le modèle de surface et une autre surface de relevé ou une surface de site. |
|
4. Résultats
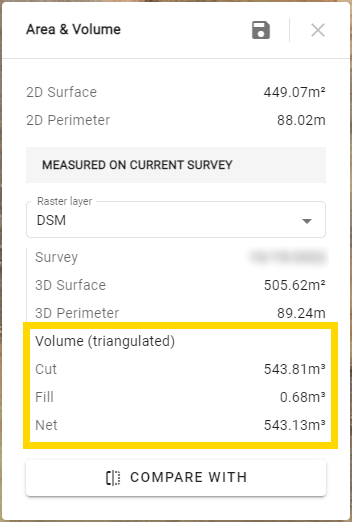
Quelle que soit la méthode de calcul utilisée, 3 types de résultats sont affichés:
- Cut: Correspond à la quantité de matériau présent dans le périmètre défini (ce qu'il y a potentiellement à enlever).
- Fill: Correspond à la quantité de vide présent dans le périmètre défini (ce qu'il y a potentiellement à remplir).
- Net: Correspond à la différence entre les mesures "Cut" et "Fill".


