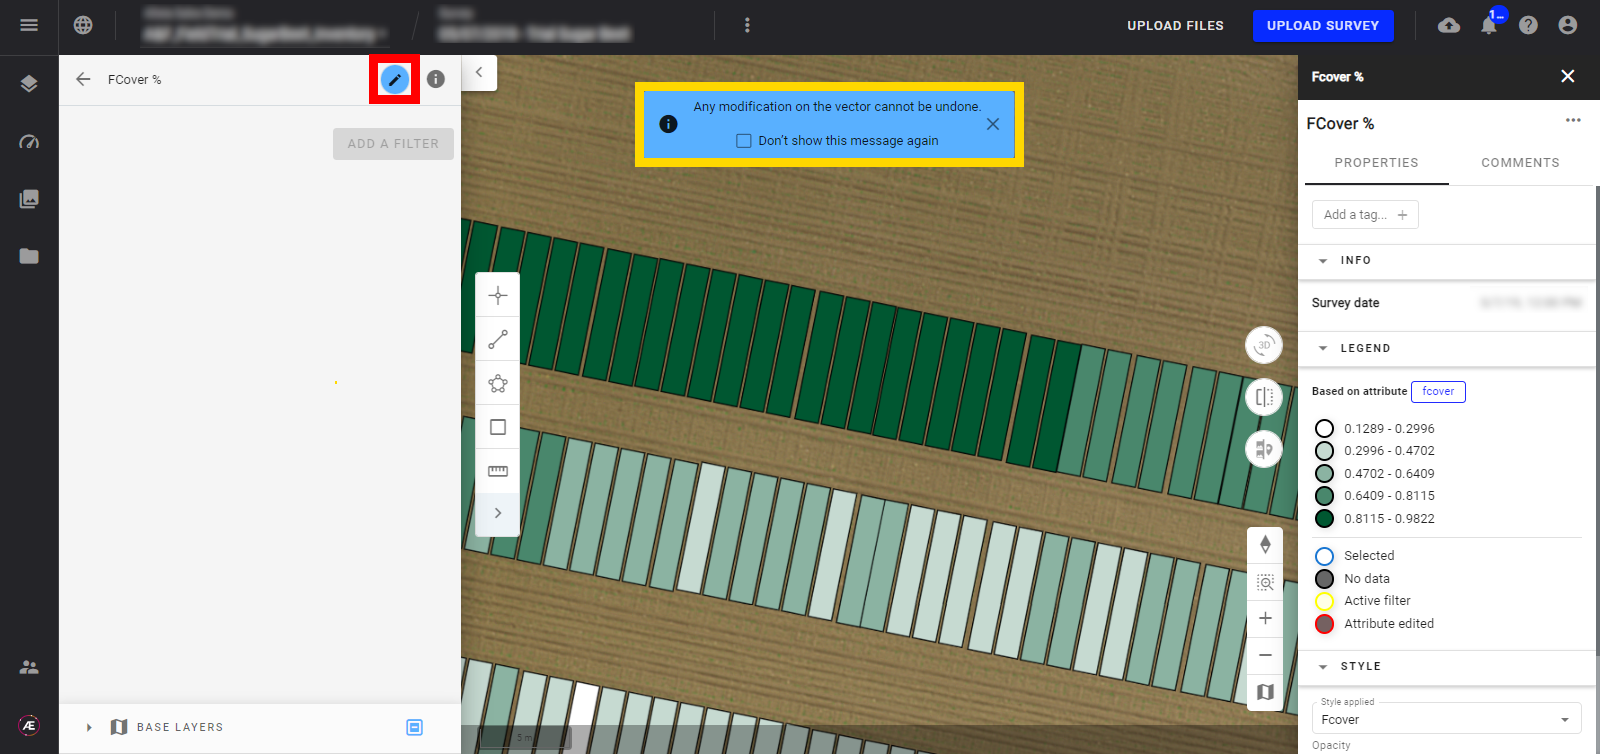
Modify Attributes and Individual Values of a Vector
1. Description
With Aether, it's possible to add and modify attributes and individual values of a vector.
2. Adding new attributes to a vector file
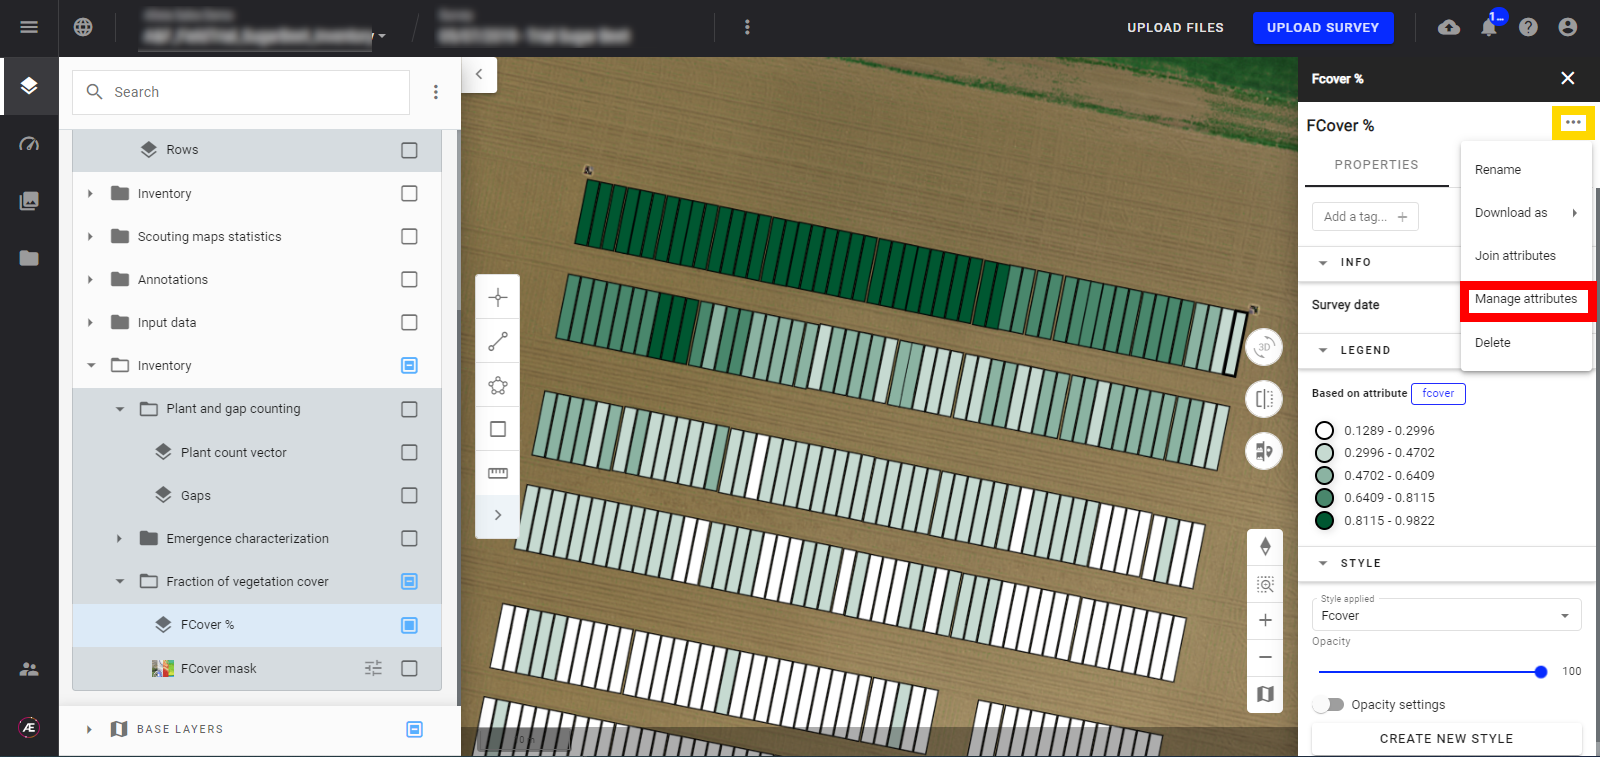
Step 1 - From the map view, click on the name of the vector in order to display the info panel on the right. Click on the three dots and then "Manage attributes".
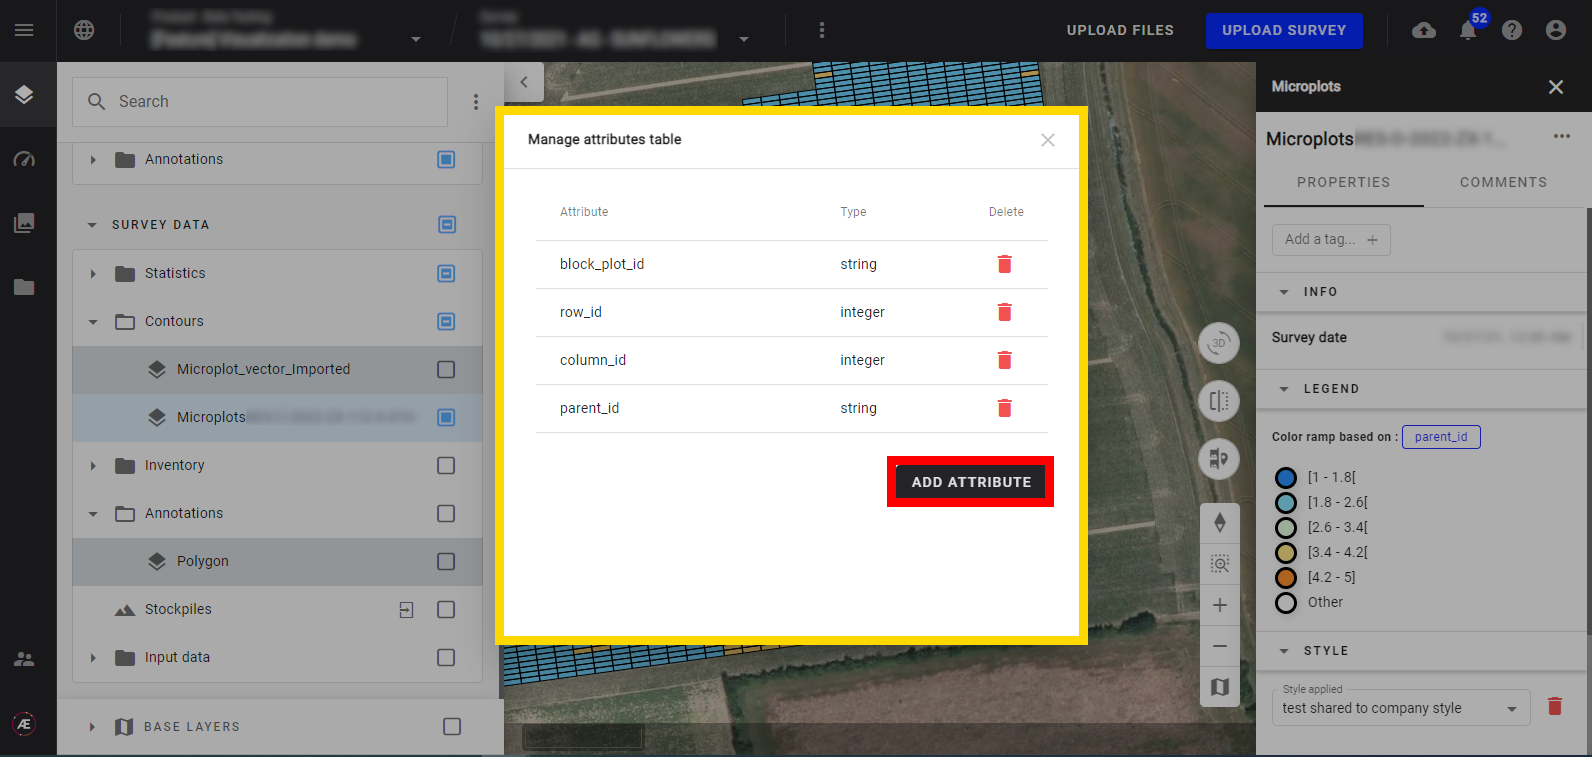
Step 2 - On the next window, click on "ADD ATTRIBUTE".
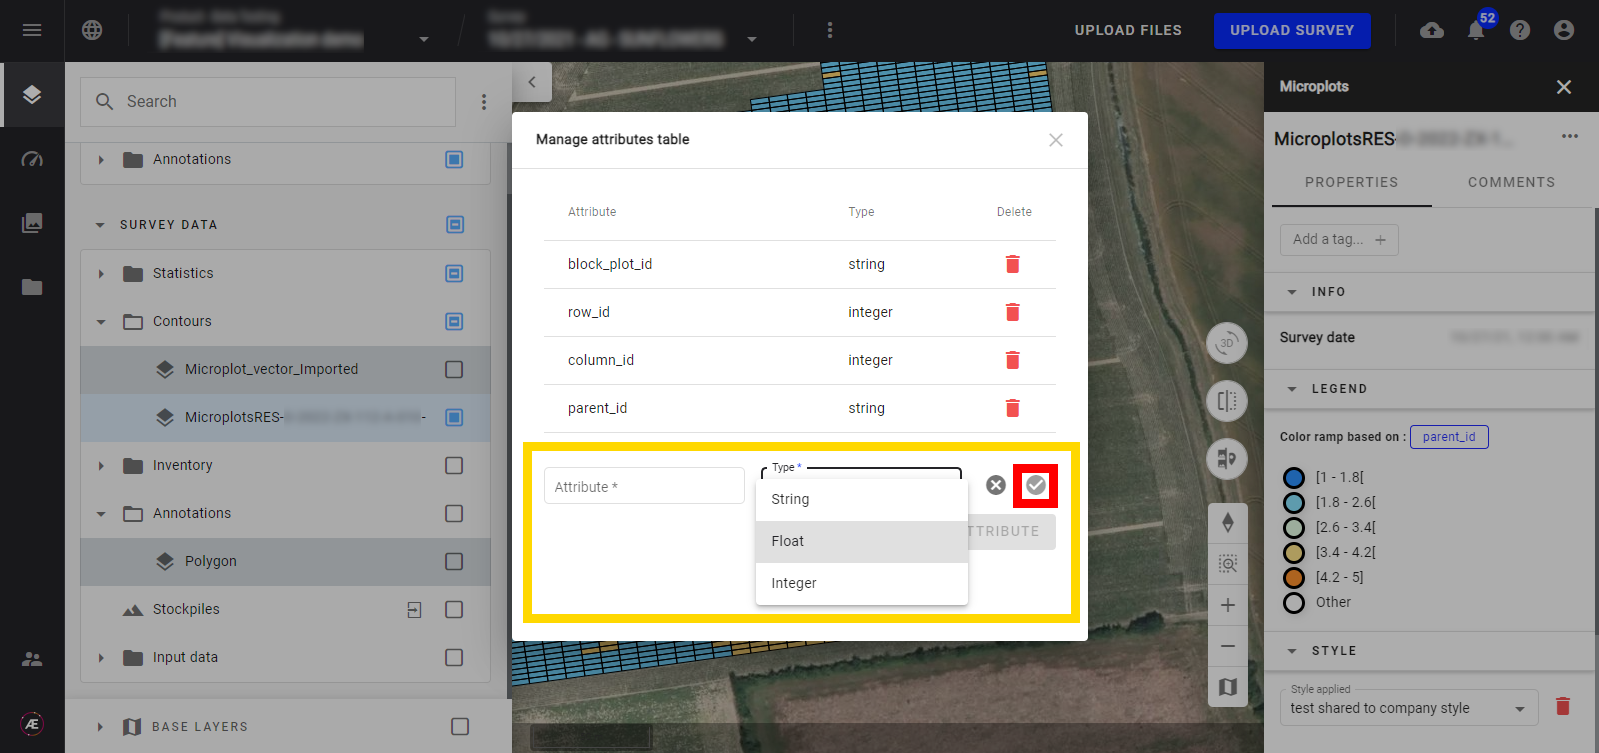
Step 3 - Define a name for the attribute and the type of attributes (string, float, or integer), and then click on the ✓ icon.
Step 4 - The new attributes now appear on the list.
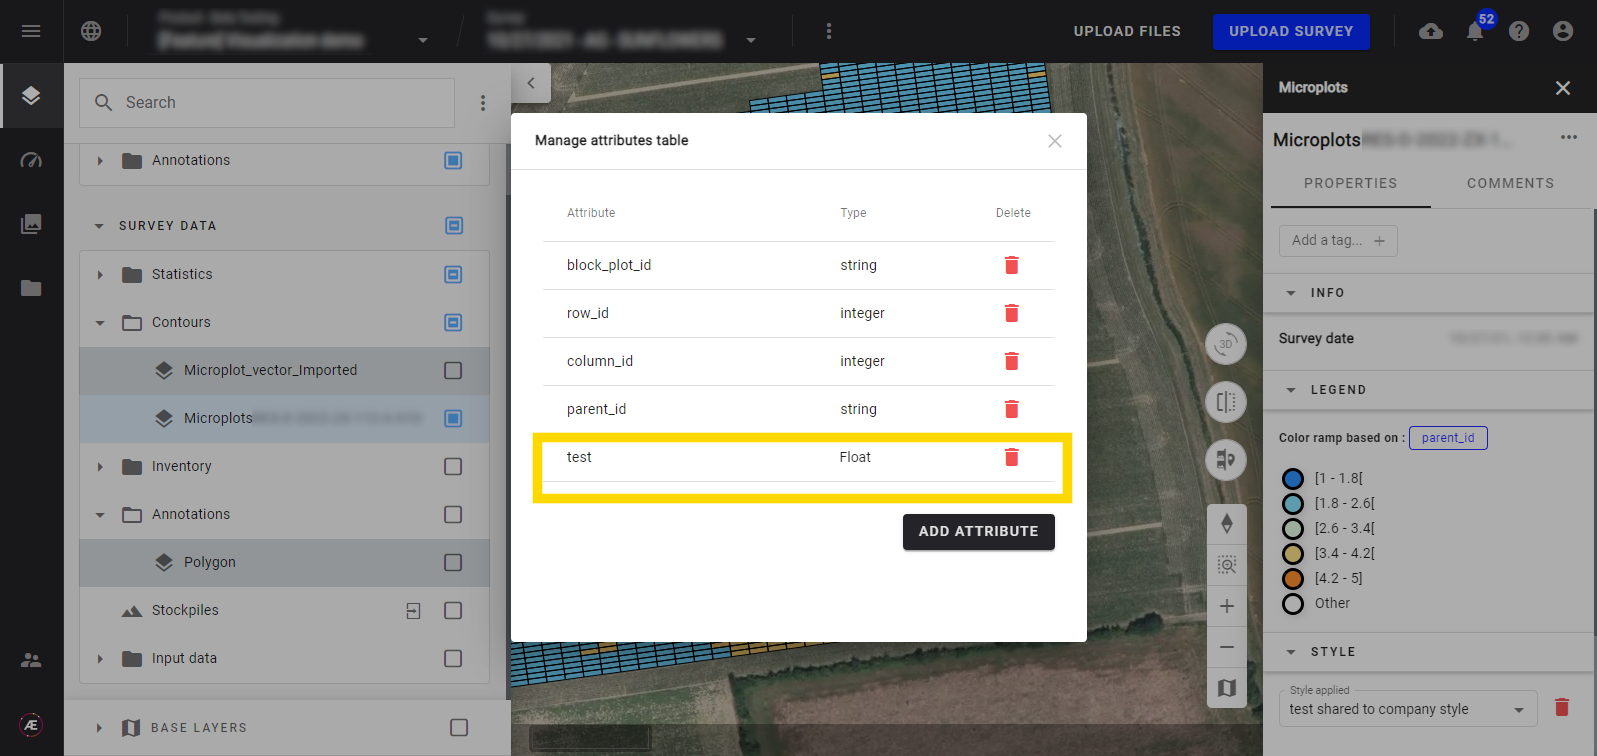
3. Adding individual value to an attribute of a vector file
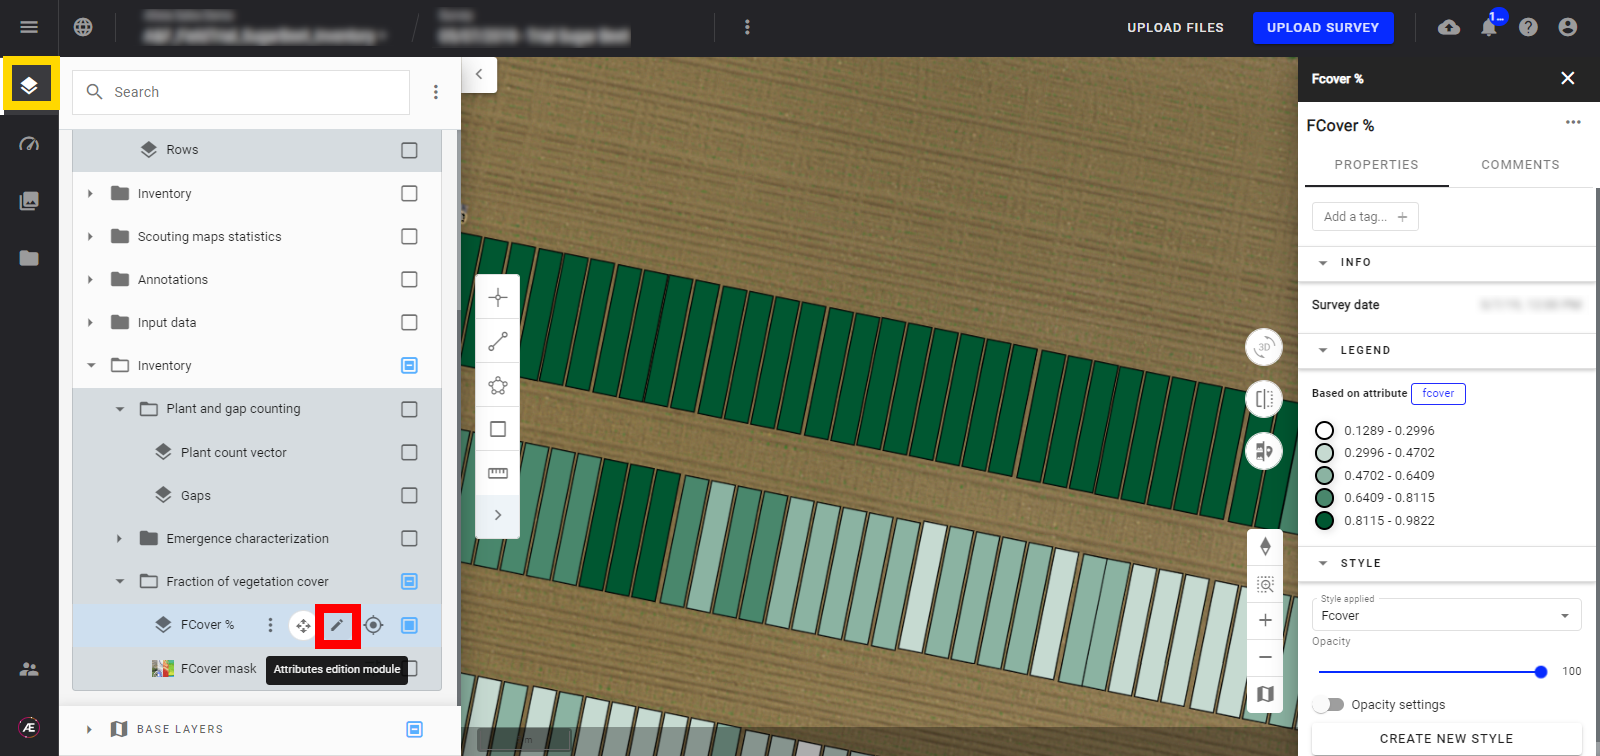
Step 1 - Click on the "Attributes edition module" button (pencil icon) next to the layer's name.
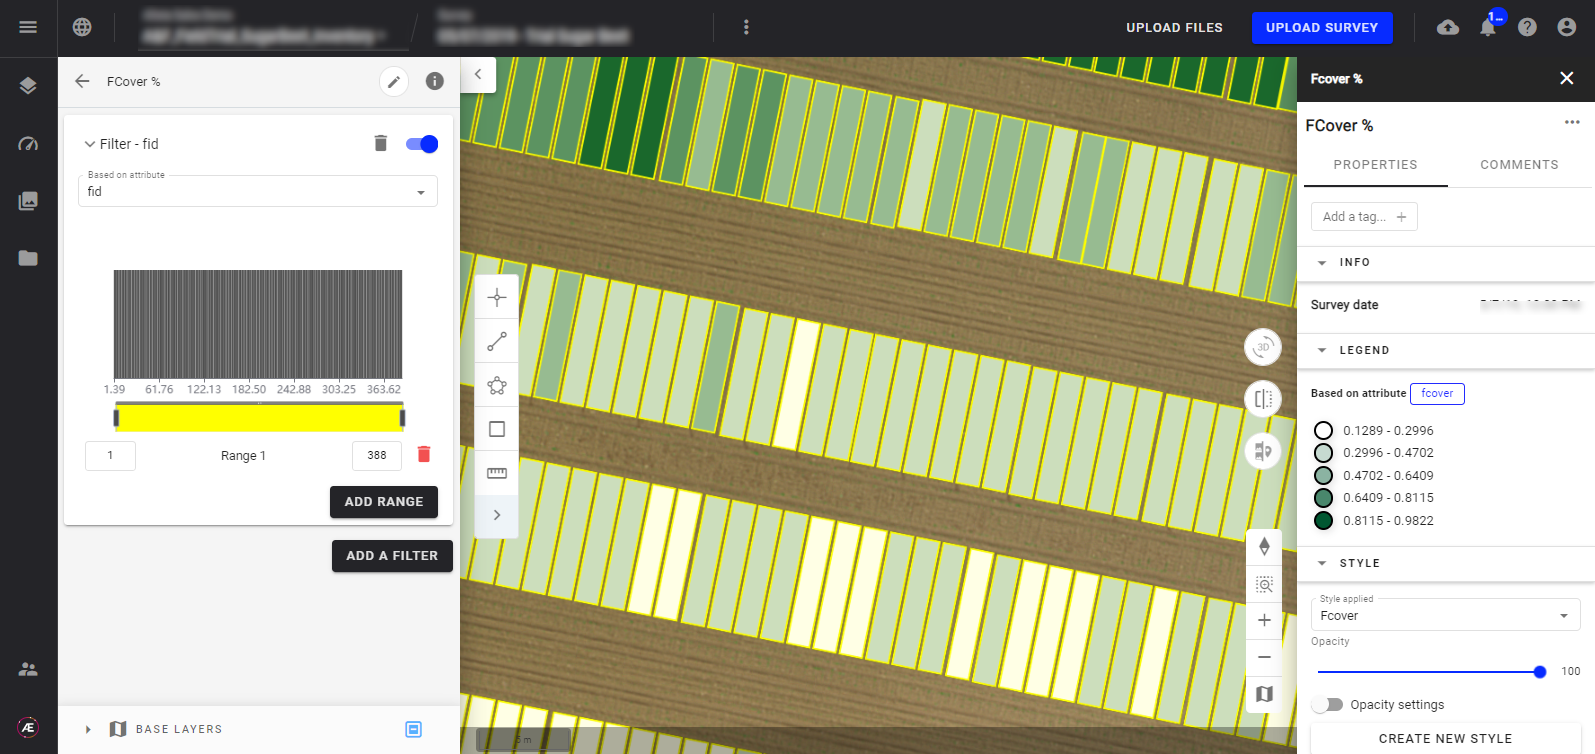
Step 2 - Optional: Add filters if you want to add values from defined filters.
See the following article for more information about the filtering capabilities: Filter tools for vector files.
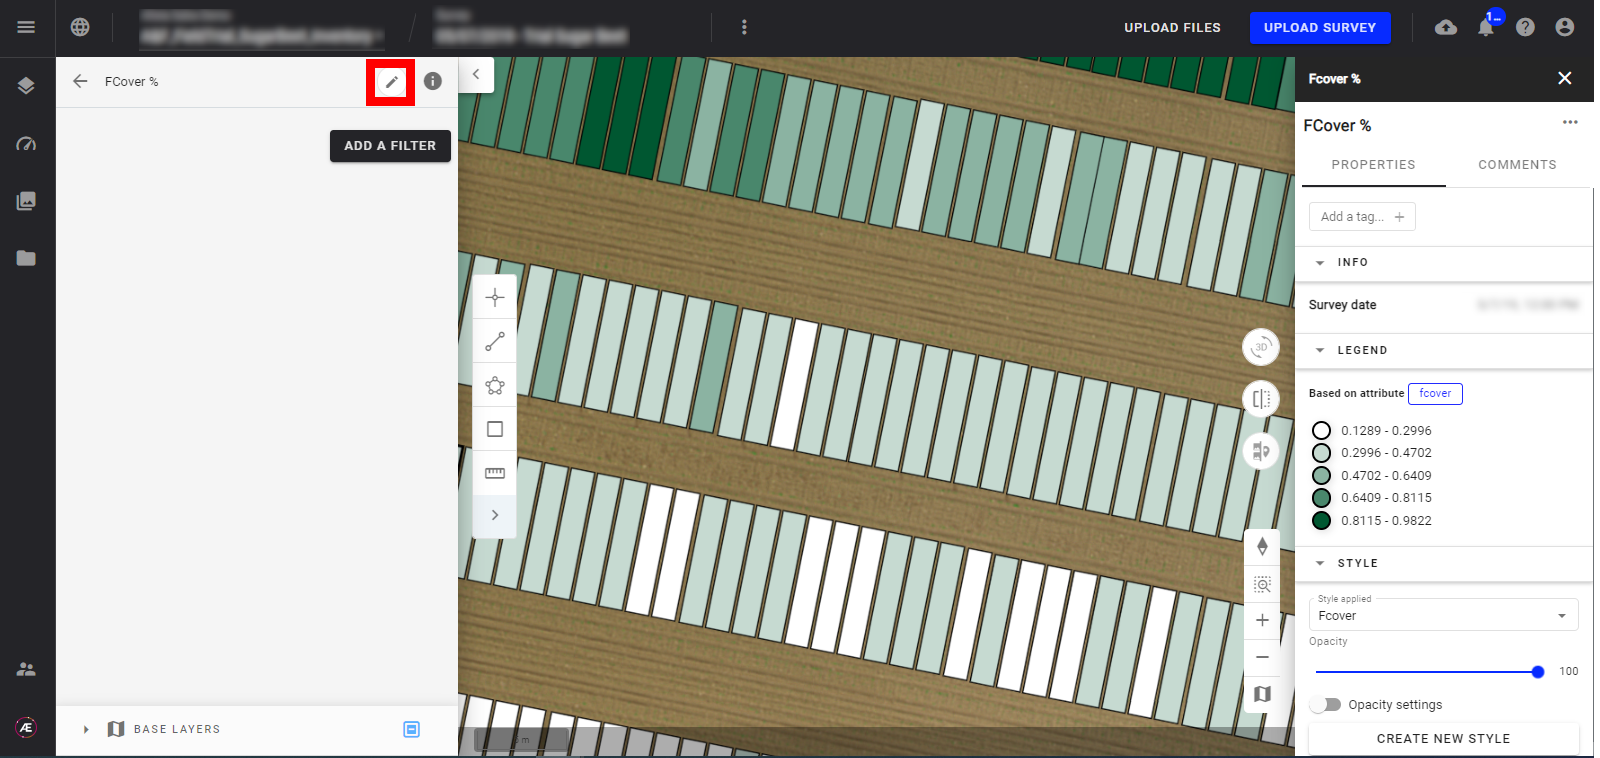
Step 3 - Click on the edit button.
Step 4 - Click on the polygon you want to edit the values. The edition panel on the right is now open.
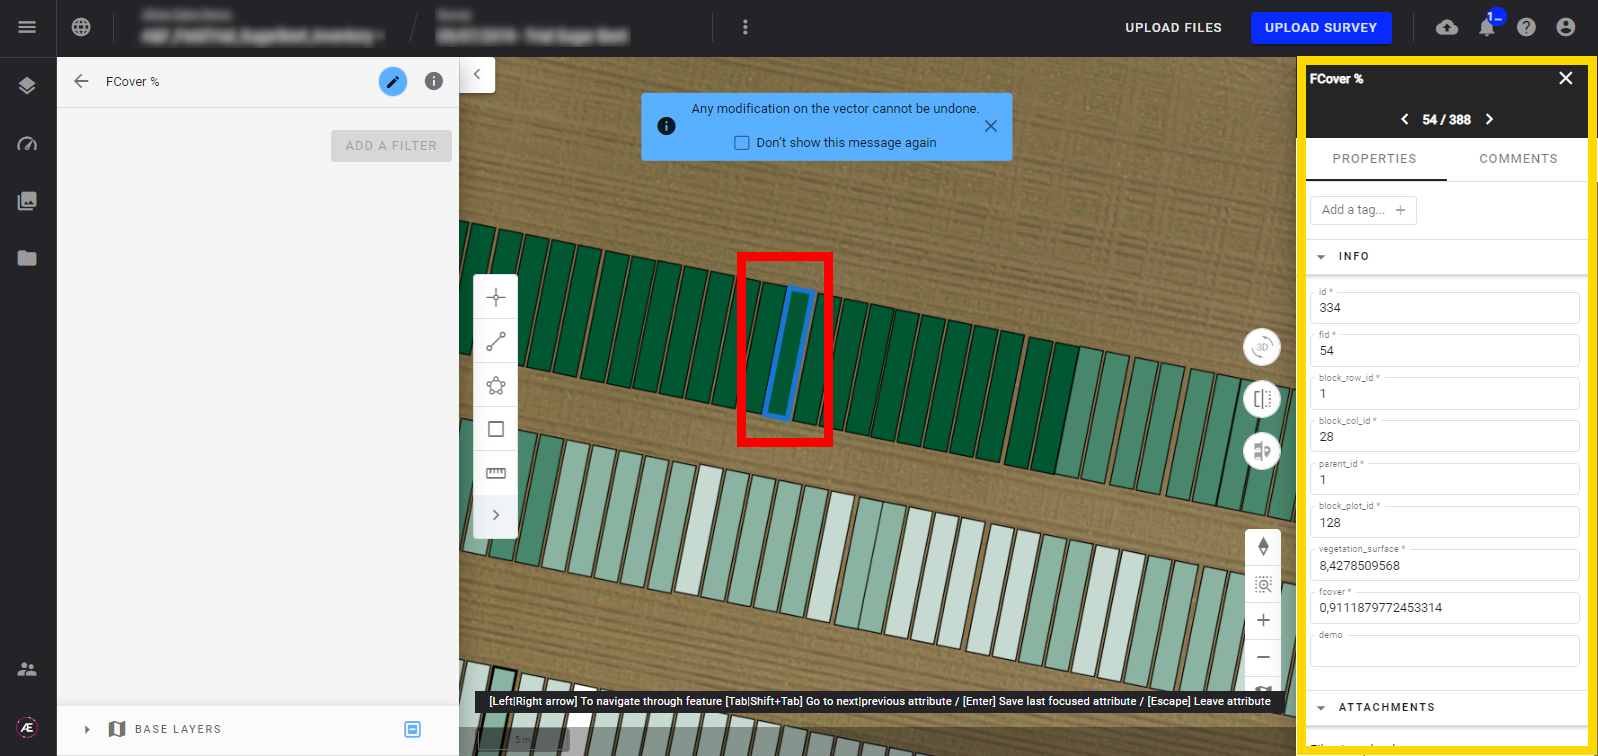
Step 5 - To Edit the values of the attributes of interest:
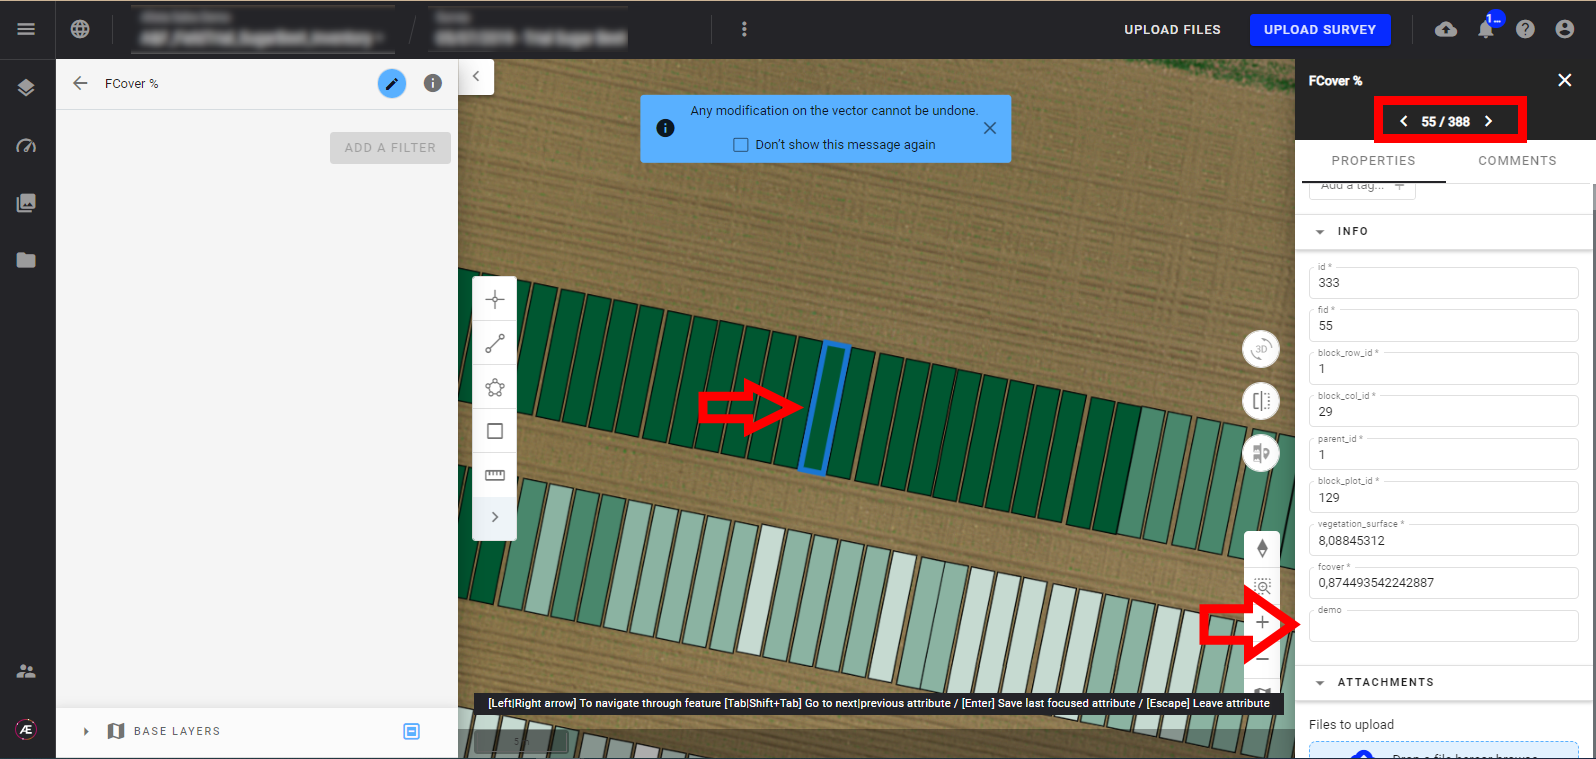
- Click on the arrows on the top right of the screen to switch from one polygon to another.
- The navigation is done within the selected polygons if a filter is activated.
- For example, add value in the attribute "demo" added in paragraph 2.
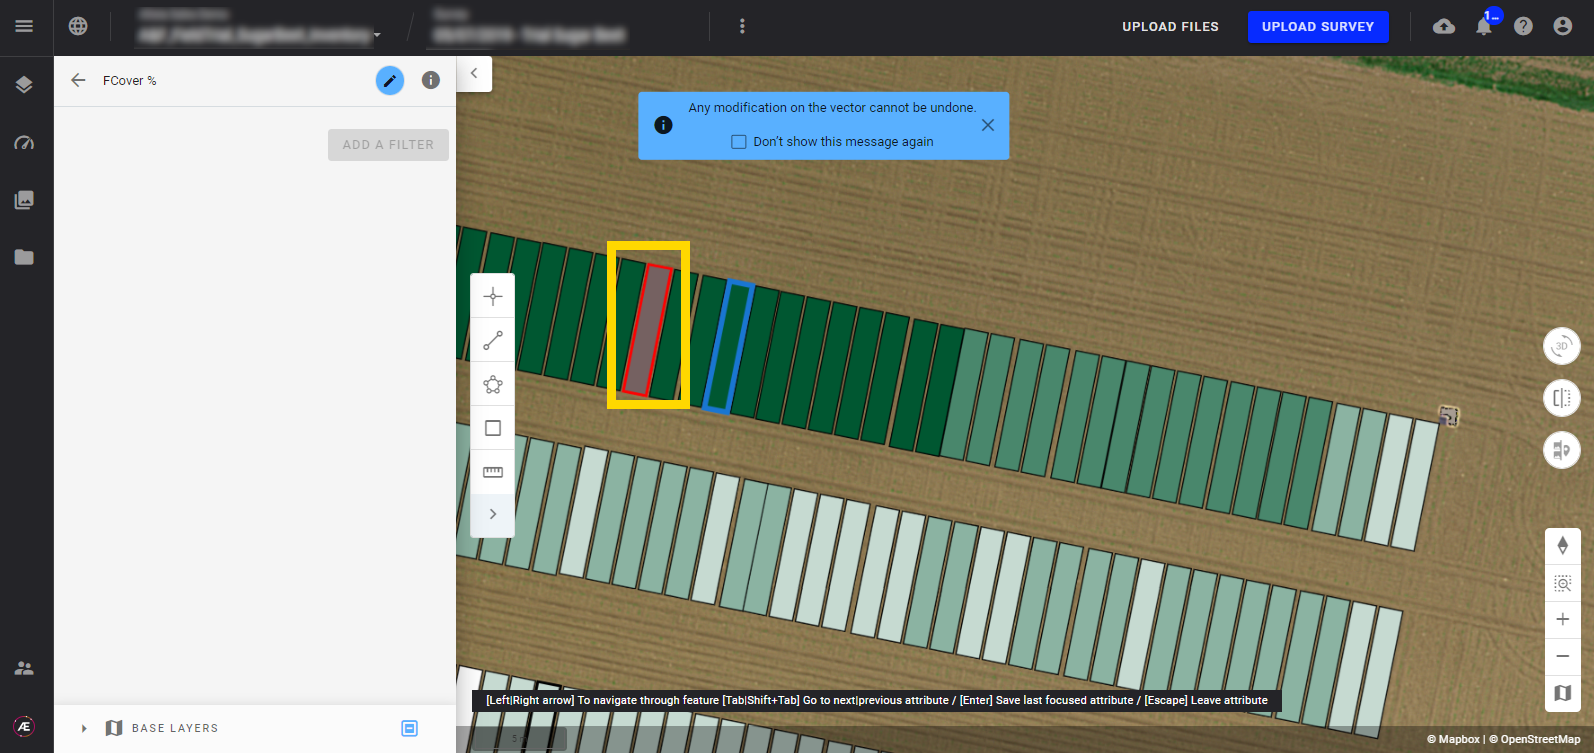
- The edited polygons automatically get a red contour.
Step 6 - Once the edition is done, click on the edit button to leave the edition mode.
 ↓
↓
To learn more: Vector Layers Styling


