Single sign On (SSO) Starter Guide with Azure Active Directory
1. Description
This is a step-by-step guide to configure the Single Sign On functionality with Azure Active Directory.
2. Prerequisites
In order to set up SSO for an Alteia-based system with an Azure Active Directory acting as an Identity Provider (IDP) for users you need:
- A Domain Manager role on the Alteia-based domain
- Administration rights on your Azure Active Directory
3. Workflow
3.1 On the Aether side: Redirect URI
As domain manager, you have access to the Identity Provider (SSO) menu in the Administration module.
Open an identity provider and note its “Redirect URI” (the other fields will have to be configured at the end of the procedure)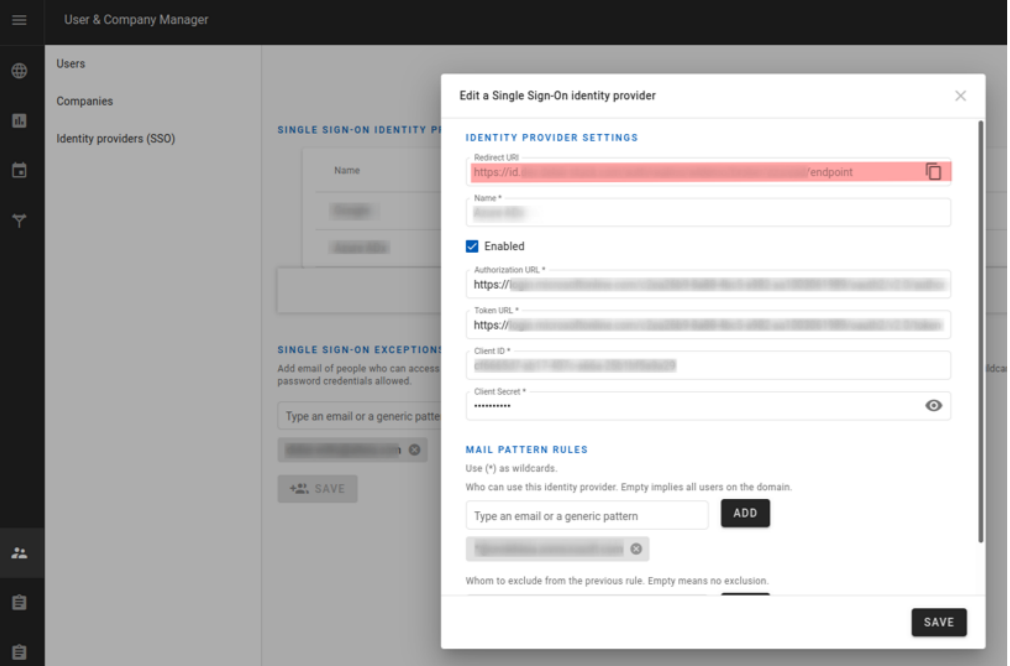
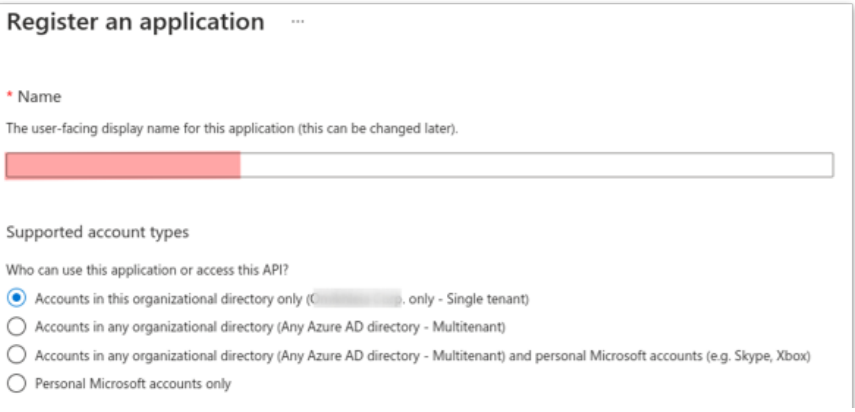
3.2 Create an App registration in Microsoft Entra ID
- Select a friendly user-facing name
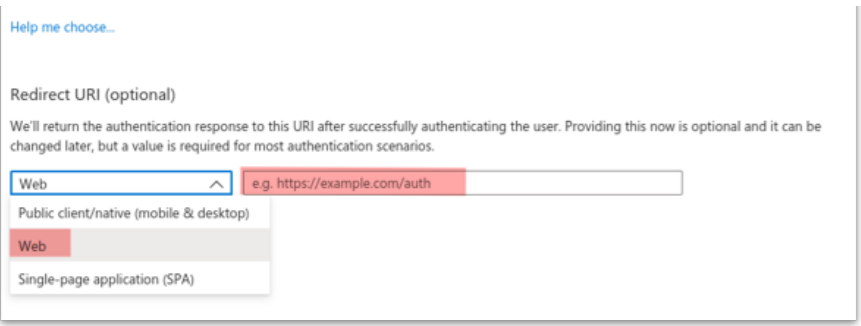
- Enter the “Redirect URI” as:
- “Web”
- URI endpoint of the Alteia based system usually in the form of: https://id.{system-name}/auth/realms/{domain-name}/broker/{ali as}/endpoint
3.3 Client secret configuration
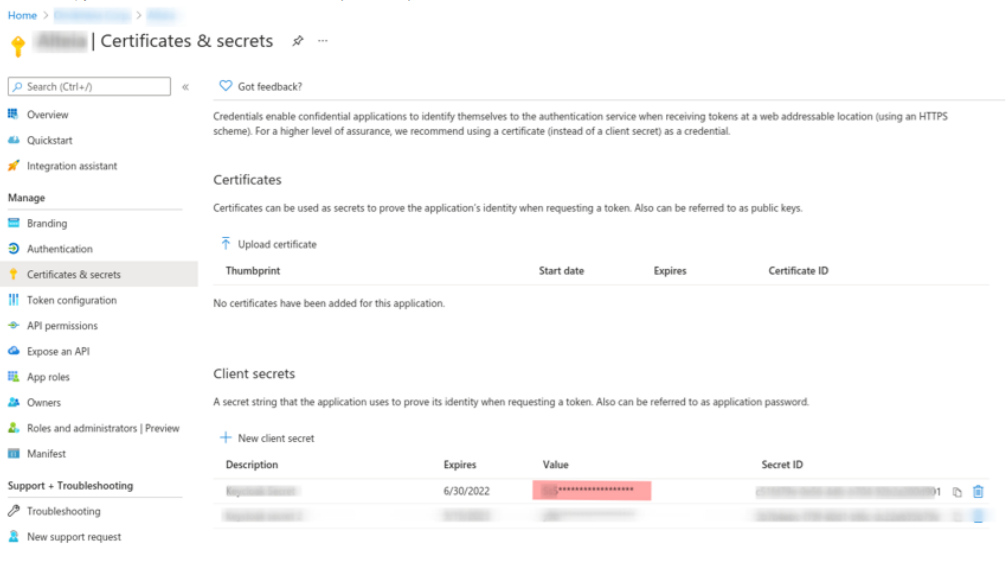
Go to the “Certificates & Secrets” menu:
- Create a new secret
- Copy and note the “Value” of the secret (Not its ID)
3.4 Client ID configuration
Go to the “Overview” option:
- Copy and note the “Client ID”
- Check the client credentials and redirect URIs from the previous steps configured

3.5 OAuth endpoints configuration
Again in the “Overview”menu, select the “Endpoint” tab:
- Copy and note the OAuth 2.0 authorization and token endpoints (v2)

3.6 Scope permissions configuration
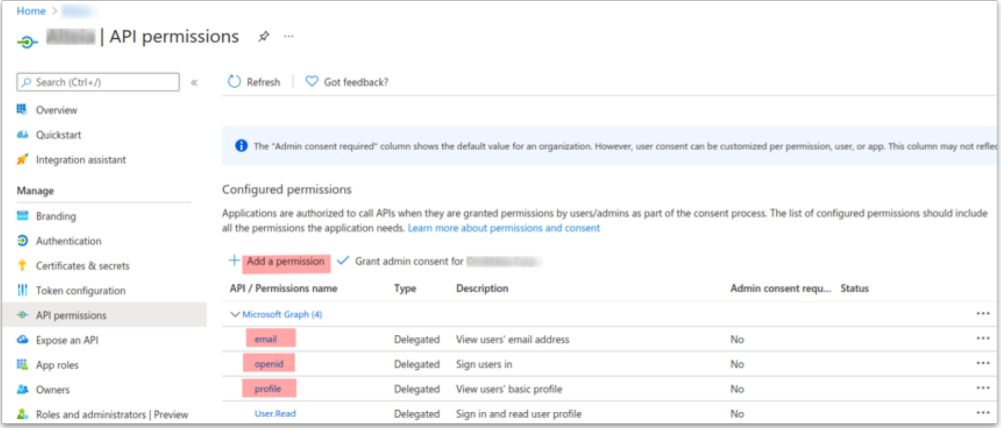
Go to the “API permissions” menu:
- Ensure support for the OpenID claims “openid profile email”, by adding the relevant permissions if needed
- Click on "Add a permission"
- Select Microsoft APIs then Microsoft Graph
- Select delegated permission : email, openid and profile
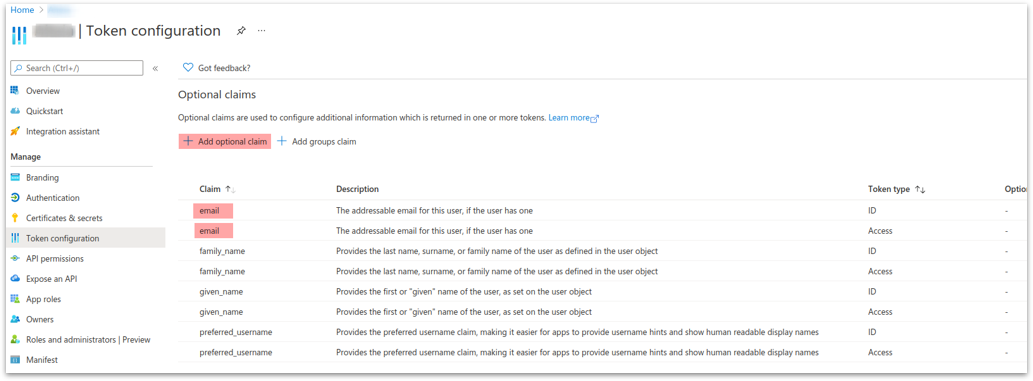
- In “Token configuration” add the “email” scope as Azure ID and Access token type (Ideally also check that the first name, last name and user name are enabled)
3.7 Aether-based system setup
Go back to the Identity Provider on the Aether-based system and:
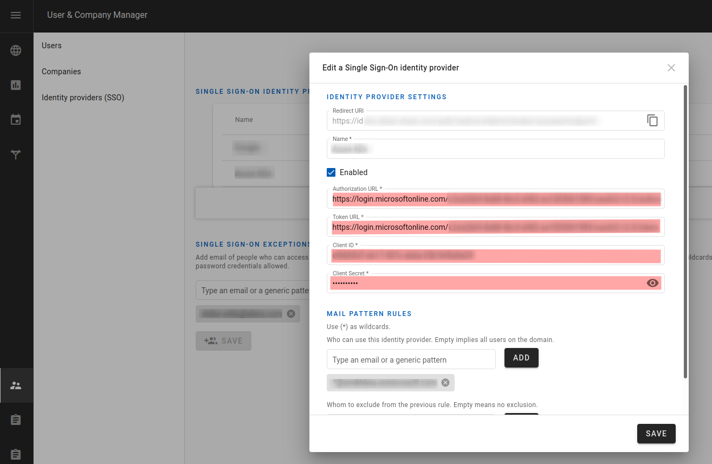
- Fill in the relevant fields
- Enable the IDP
- Save
