

Compare View
1. Introduction
The Compare View offers a fast and convenient way to compare time-series surveys. You can monitor change over time, analyze project progression, and report the status on variable assets. There are three comparison methods available :
- Slider View
- Split View
- Overlay View
The Slider view is the default mode.
To access the Compare tools from a project containing at least 2 different surveys from the same geographical area or to compare project level layers, select the "Compare View" from the right side of the screen.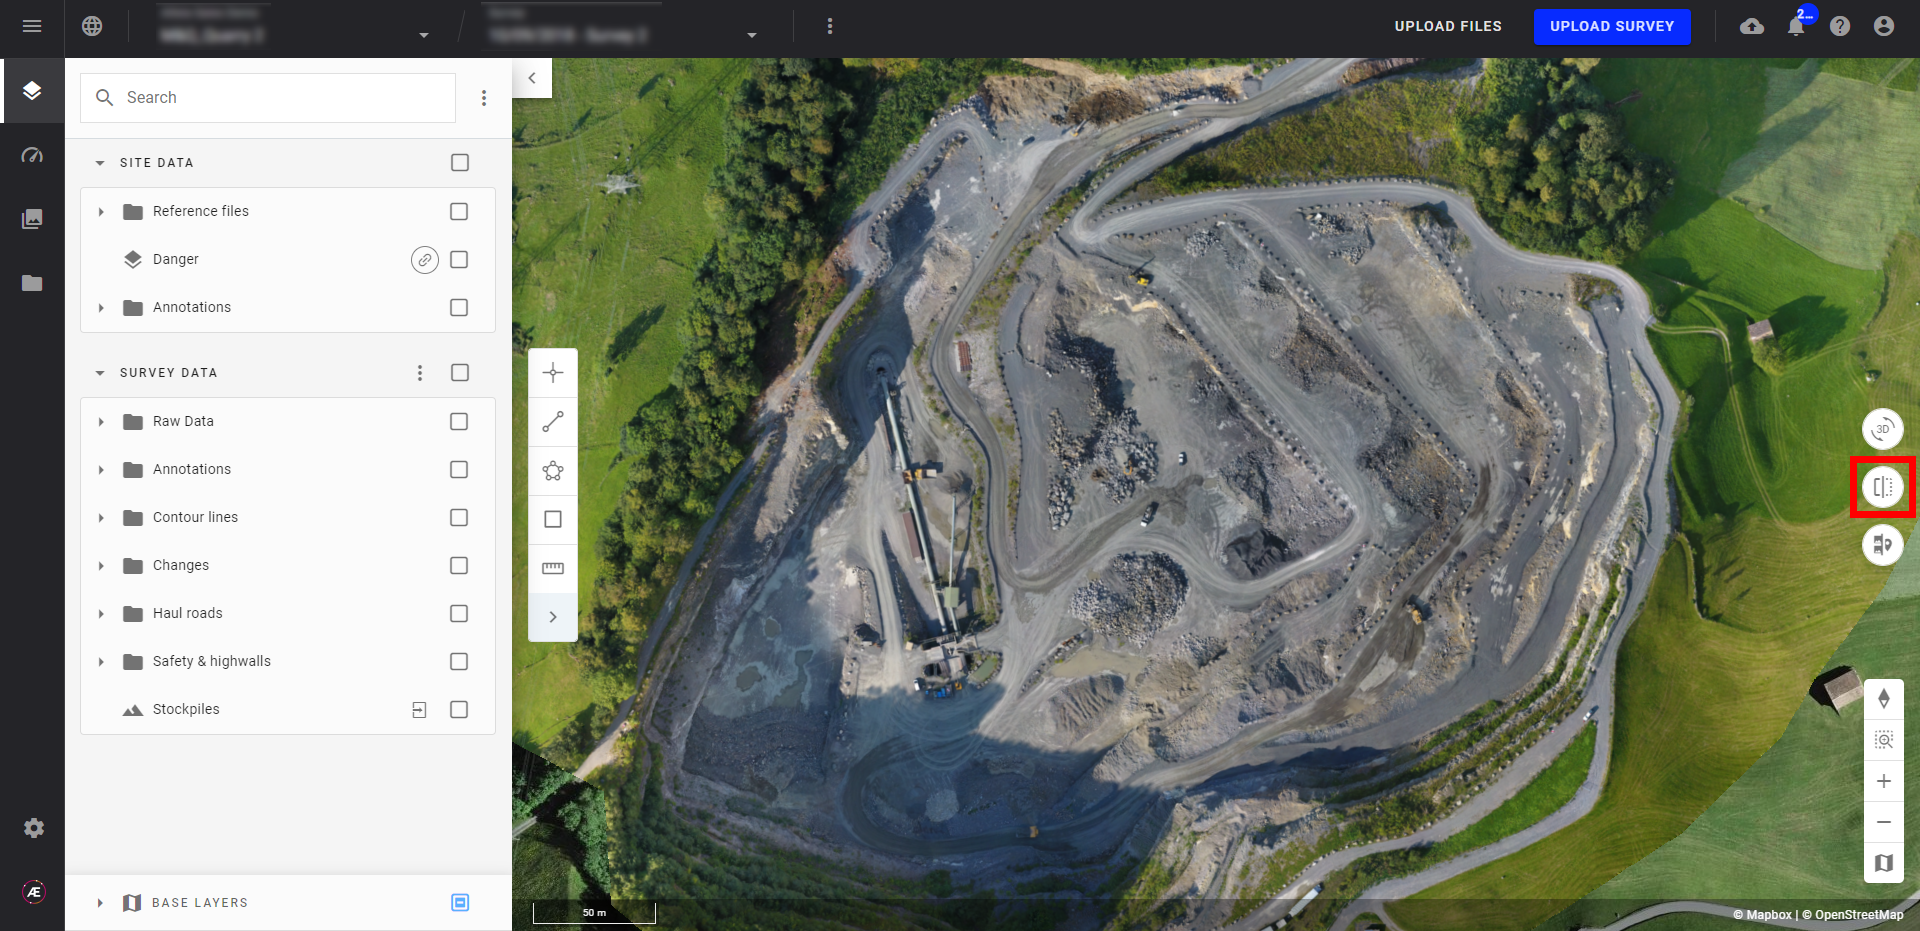
2. Comparison Methods
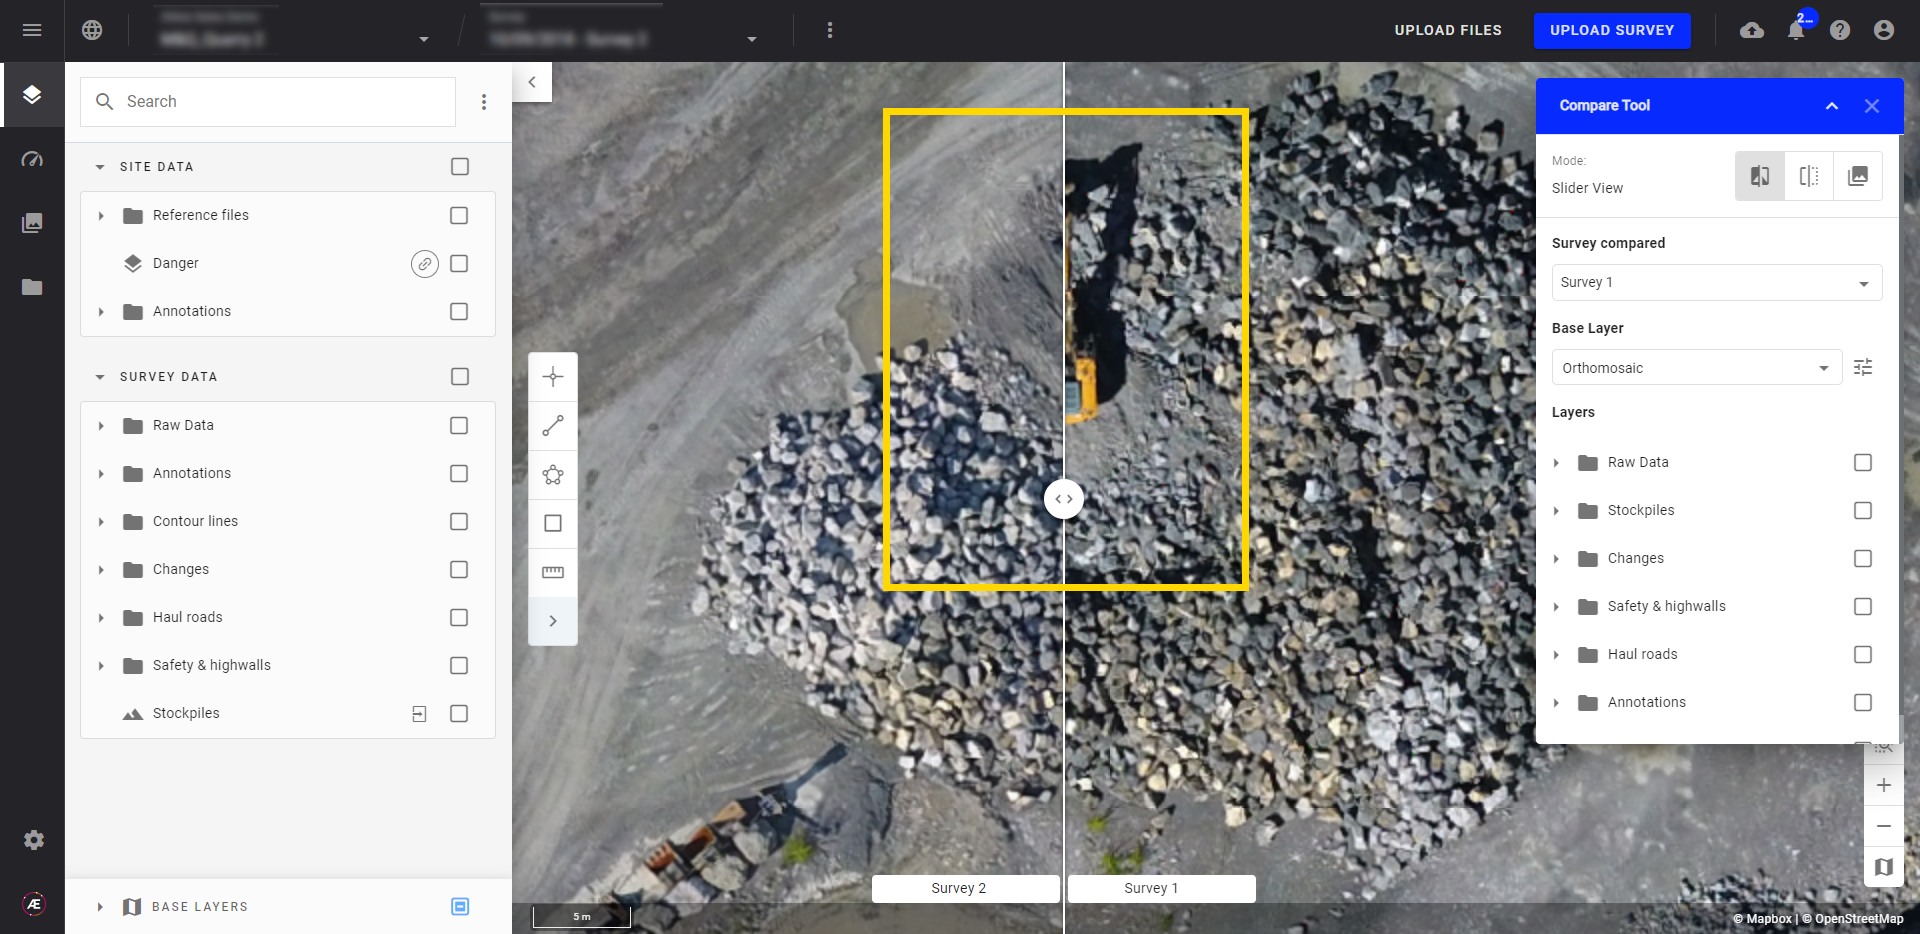
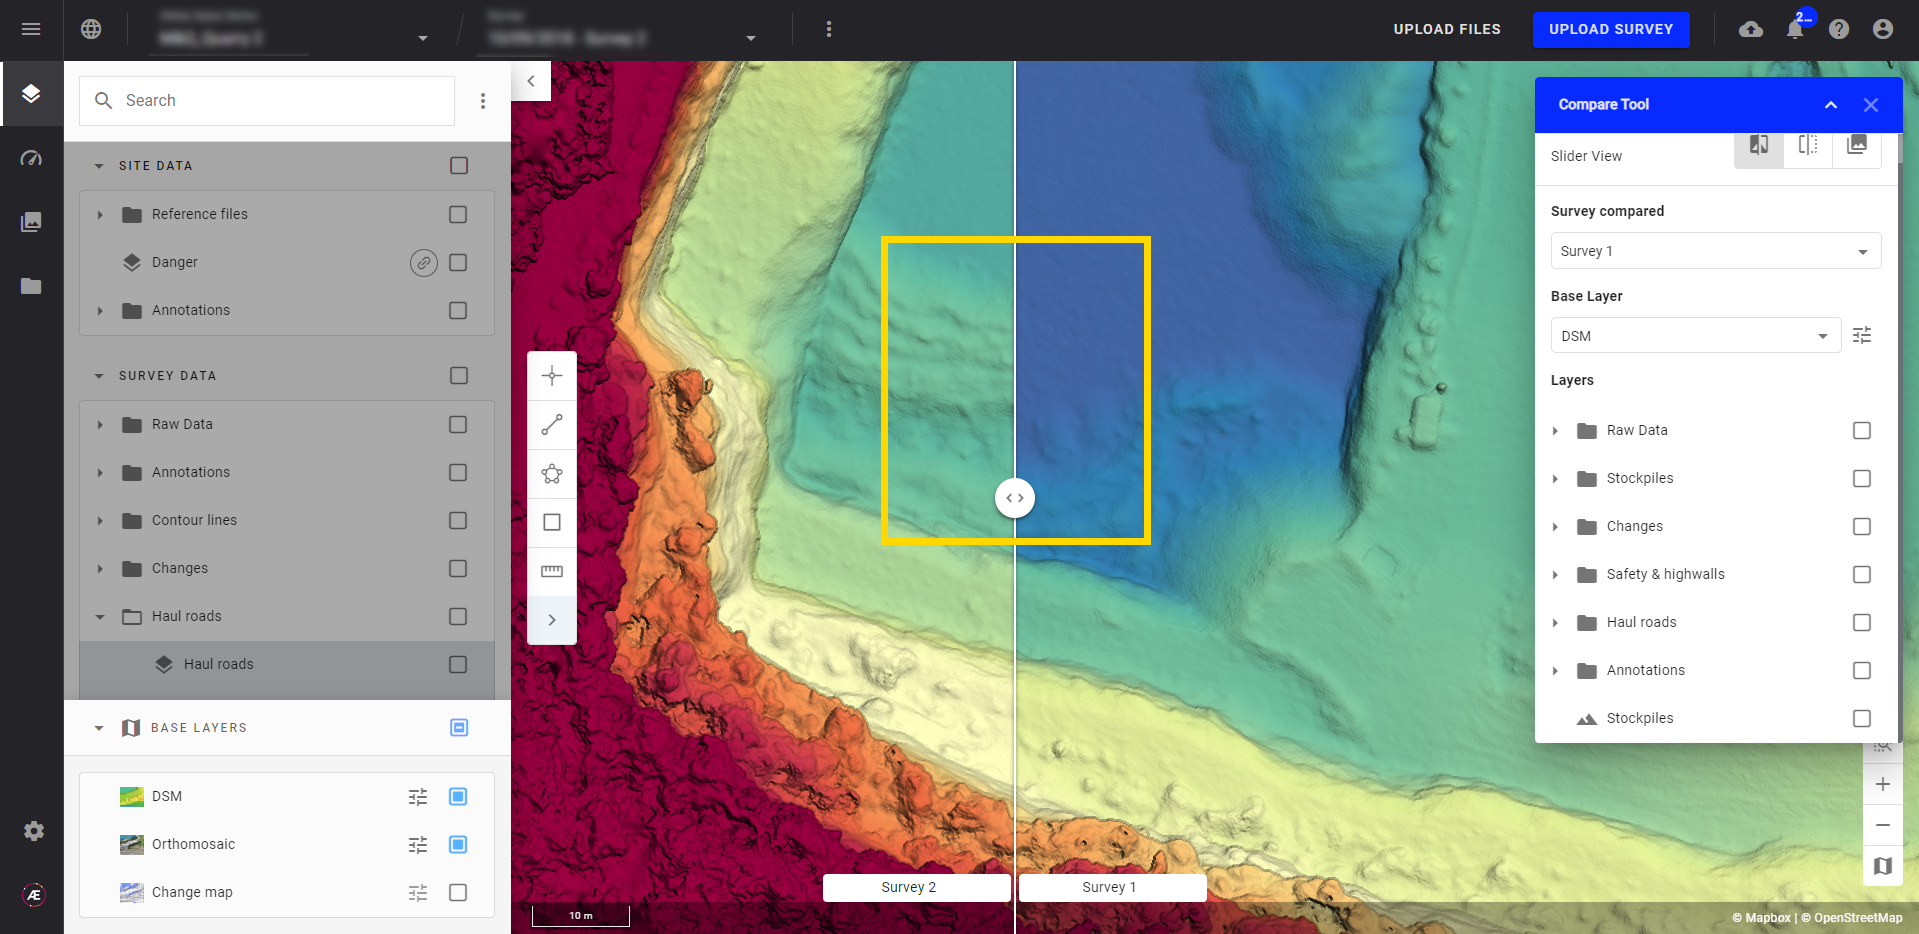
2.1 Slider view
The Slider View allows you to swipe between two layers side by side for a dynamic examination.
Select the survey you want to compare (right side of the screen) with your current survey (left side of the screen) or select a project level layer.
- The comparison can be made on any raster Base Layer (orthophotos, DSMs, or other) (1).
- You can also display and compare analytic output layers, vector data, and annotations (2).
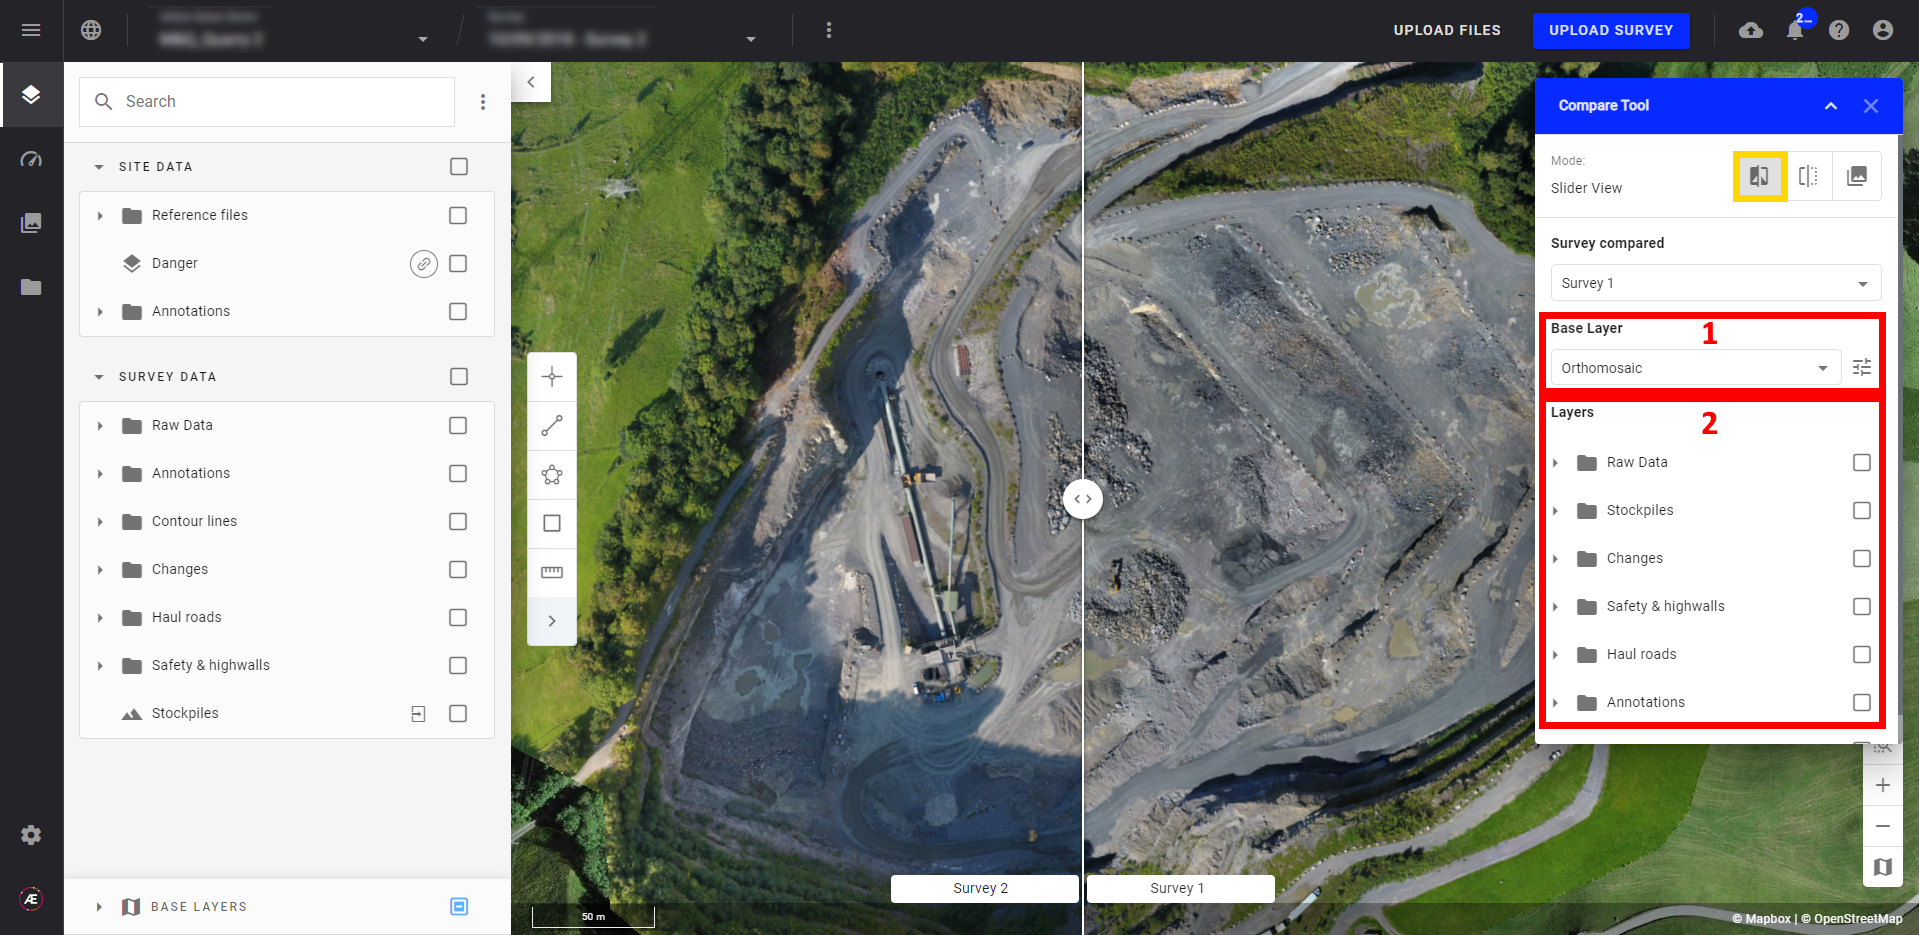
This mode is particularly useful to check for the absence or presence of objects or to examine variations in the terrain surface from DSMs.
2.2 Split View
The Split View enables you to compare two layers side by side.
The position of the mouse is visible thanks to a bubble (framed in yellow below).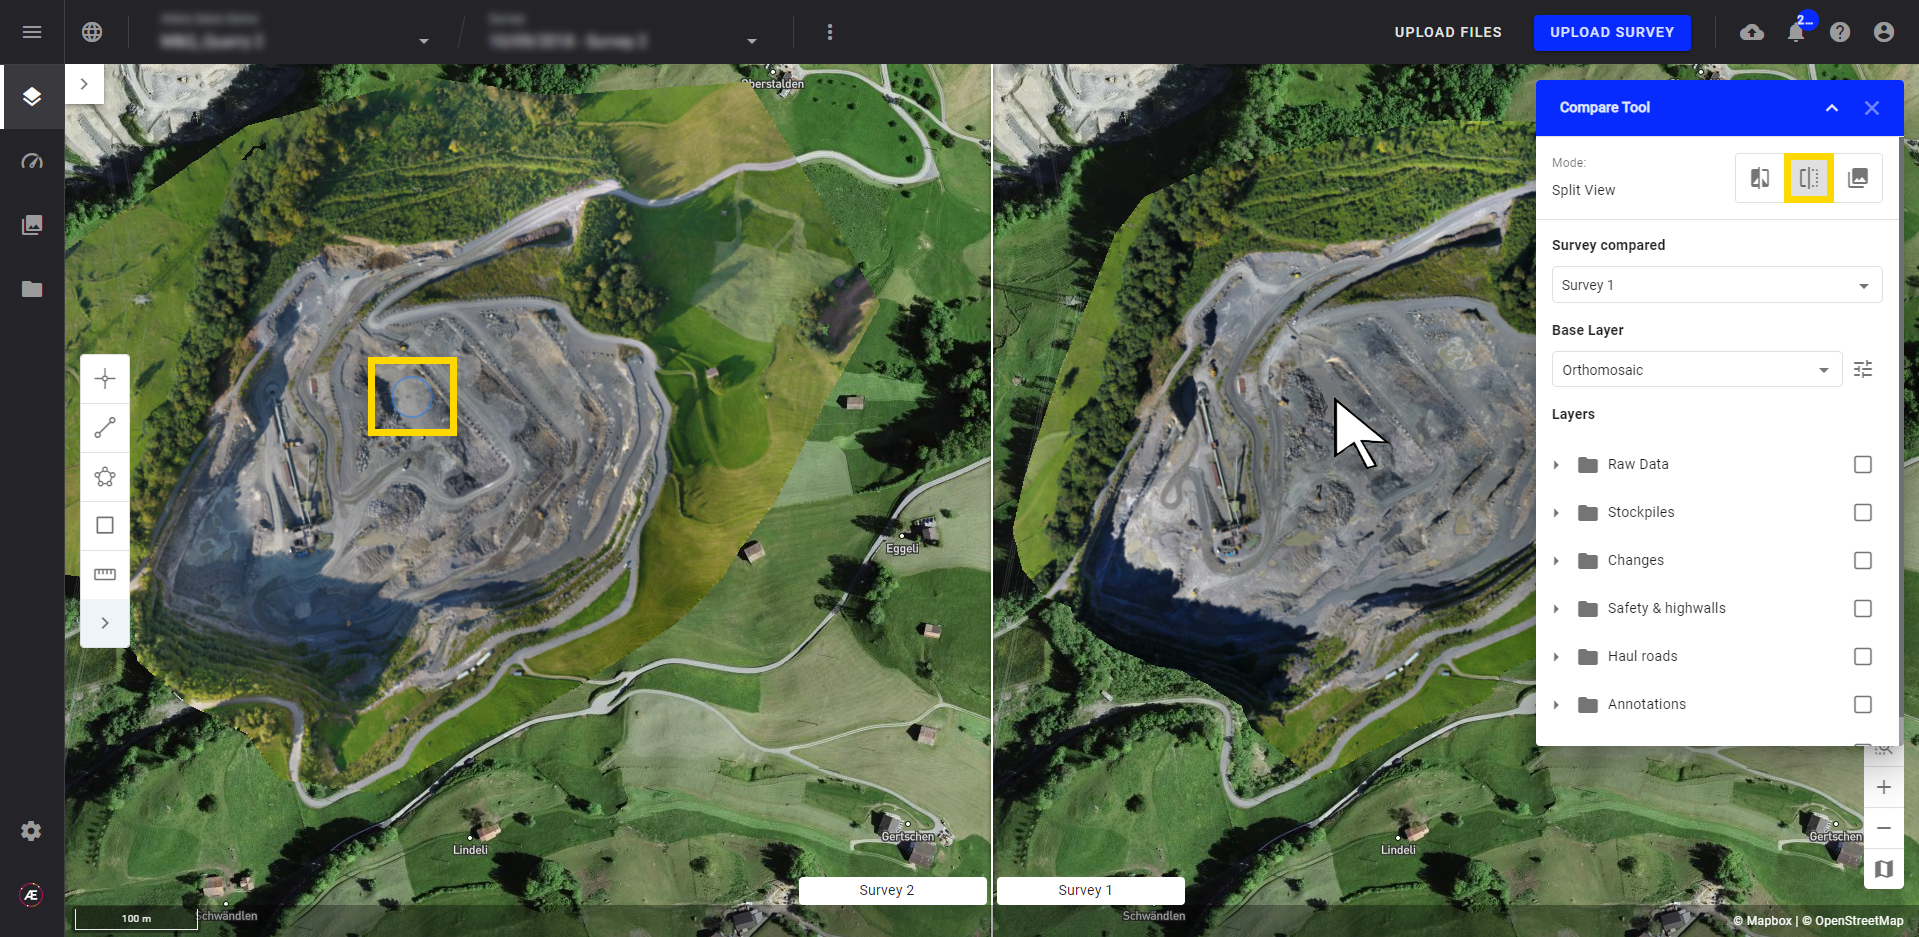
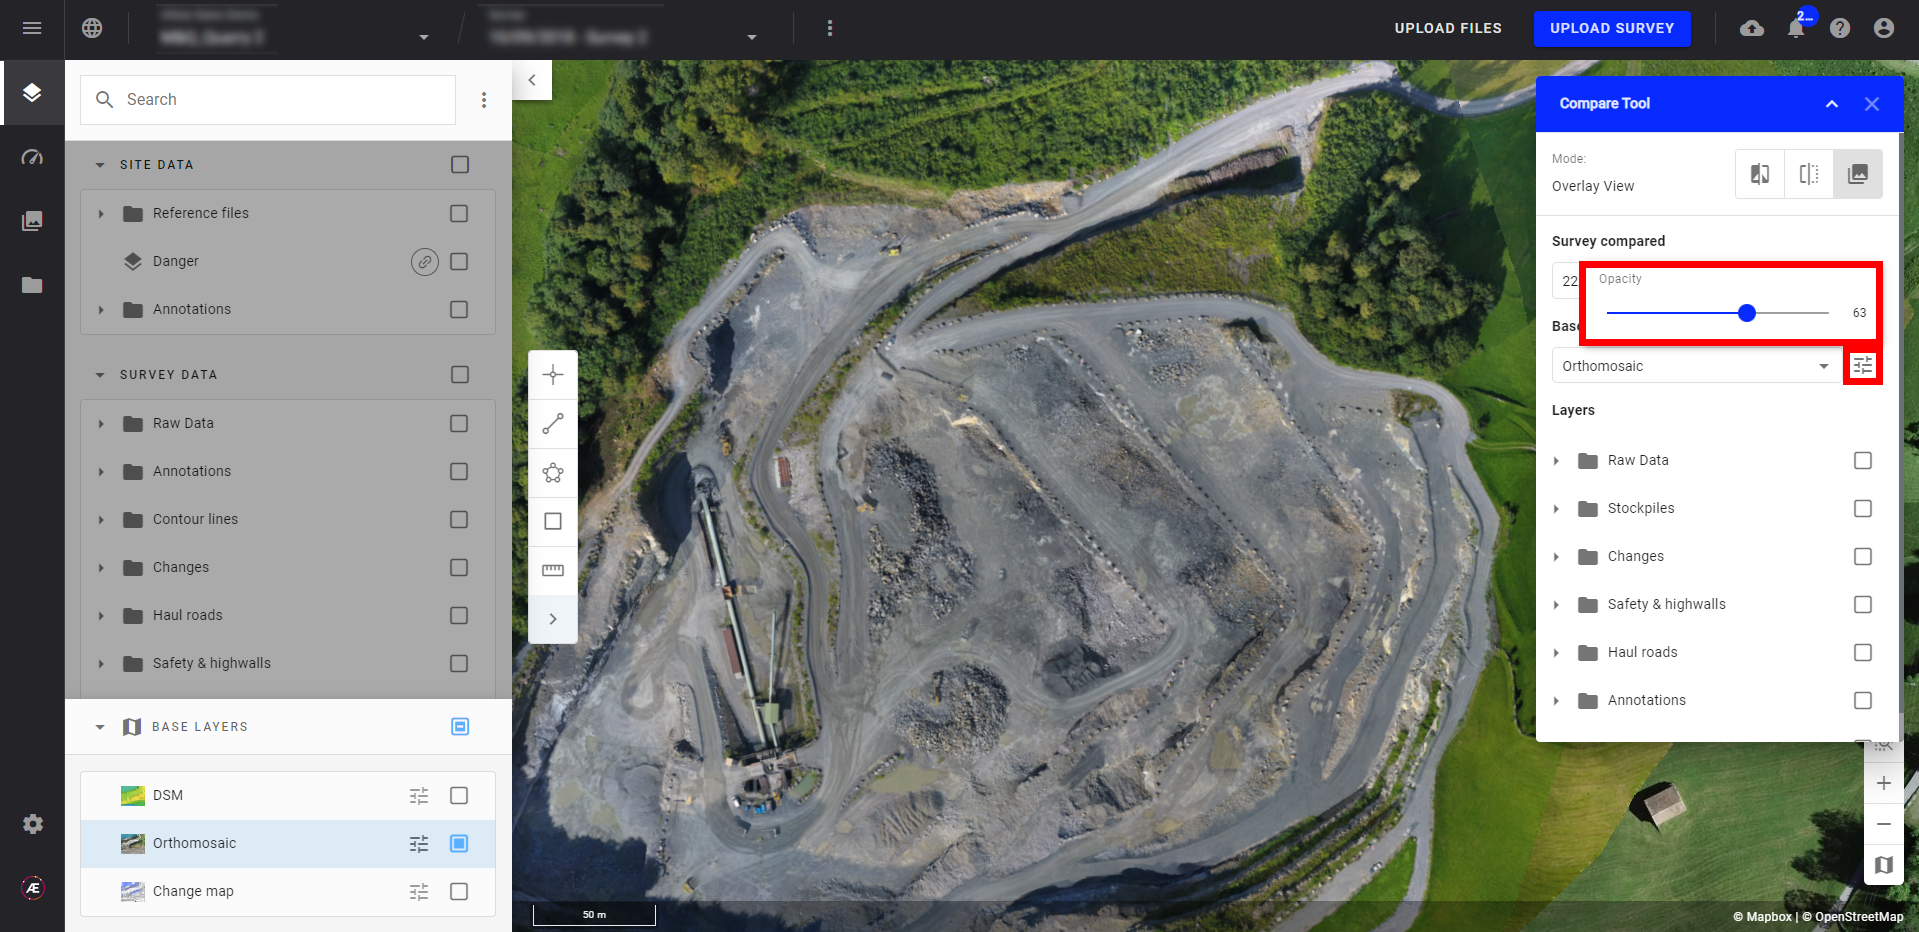
2.3 Overlay mode
The Overlay mode overlays two layers (orthophotos, DSMs, etc...) at the same position.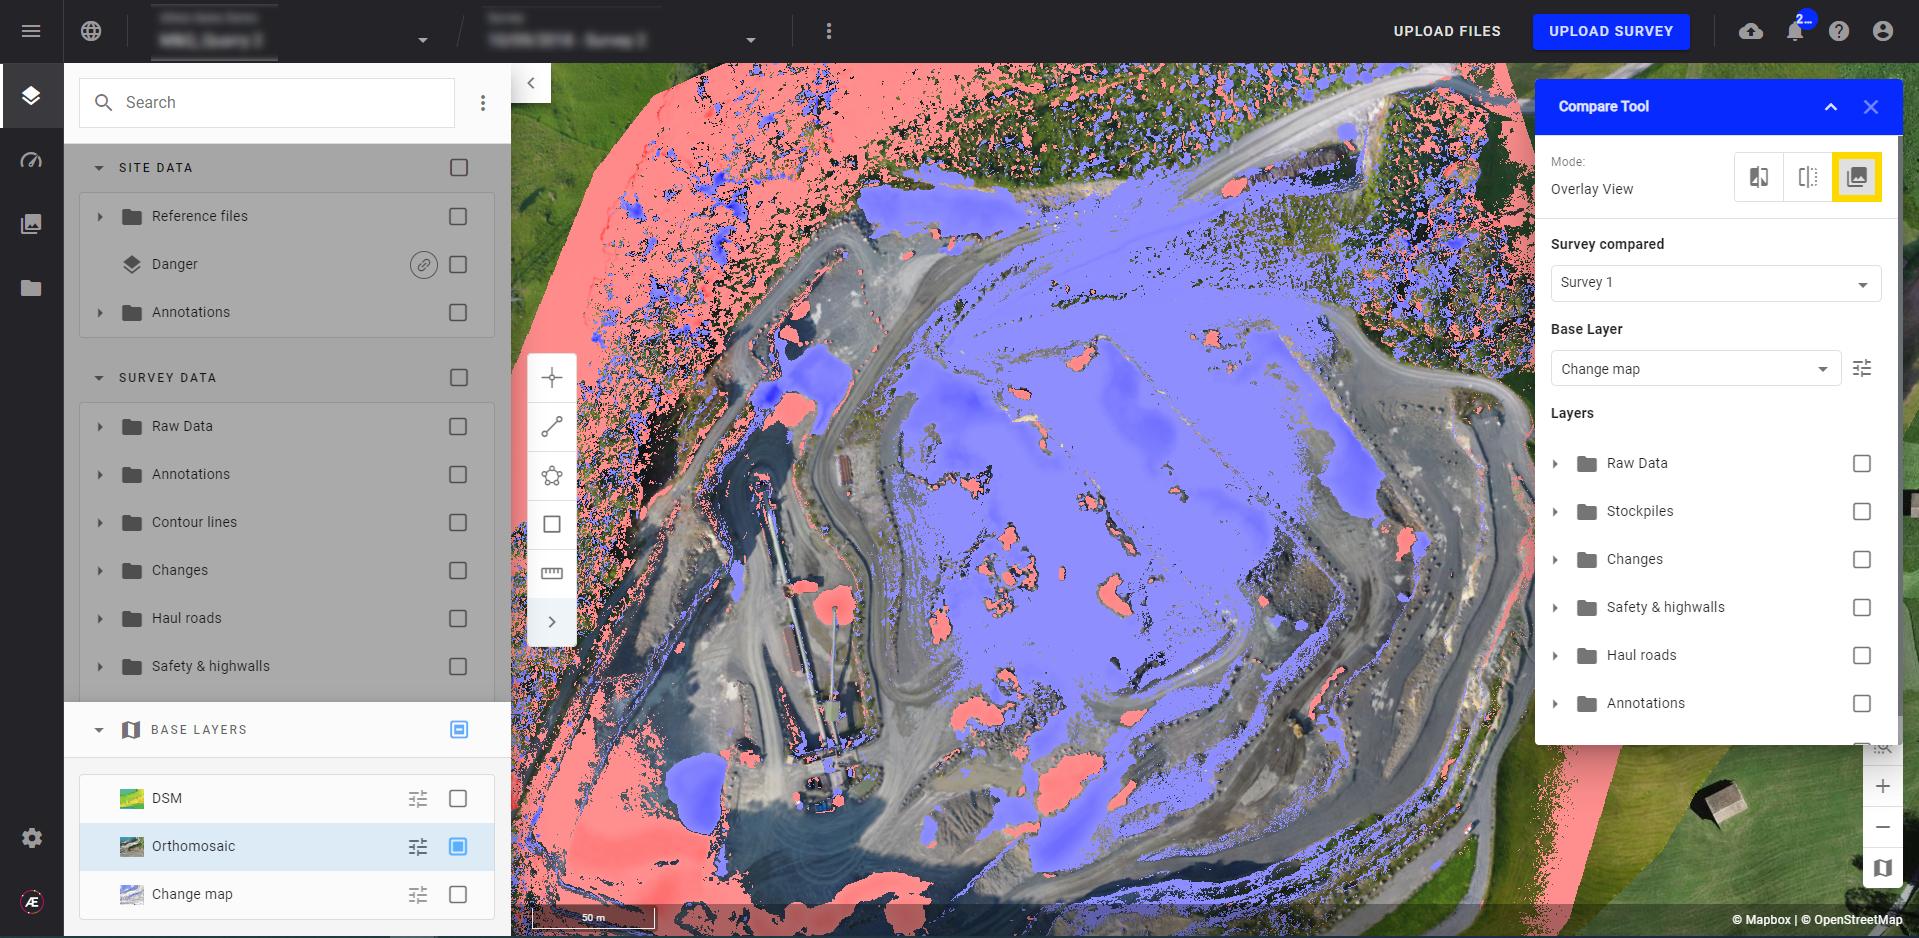
Visual examination for differences can be eased by adjusting the top layer opacity using the slider bar.
Read here more on performing thorough comparisons based on DSMs, using the Change Map analytic.
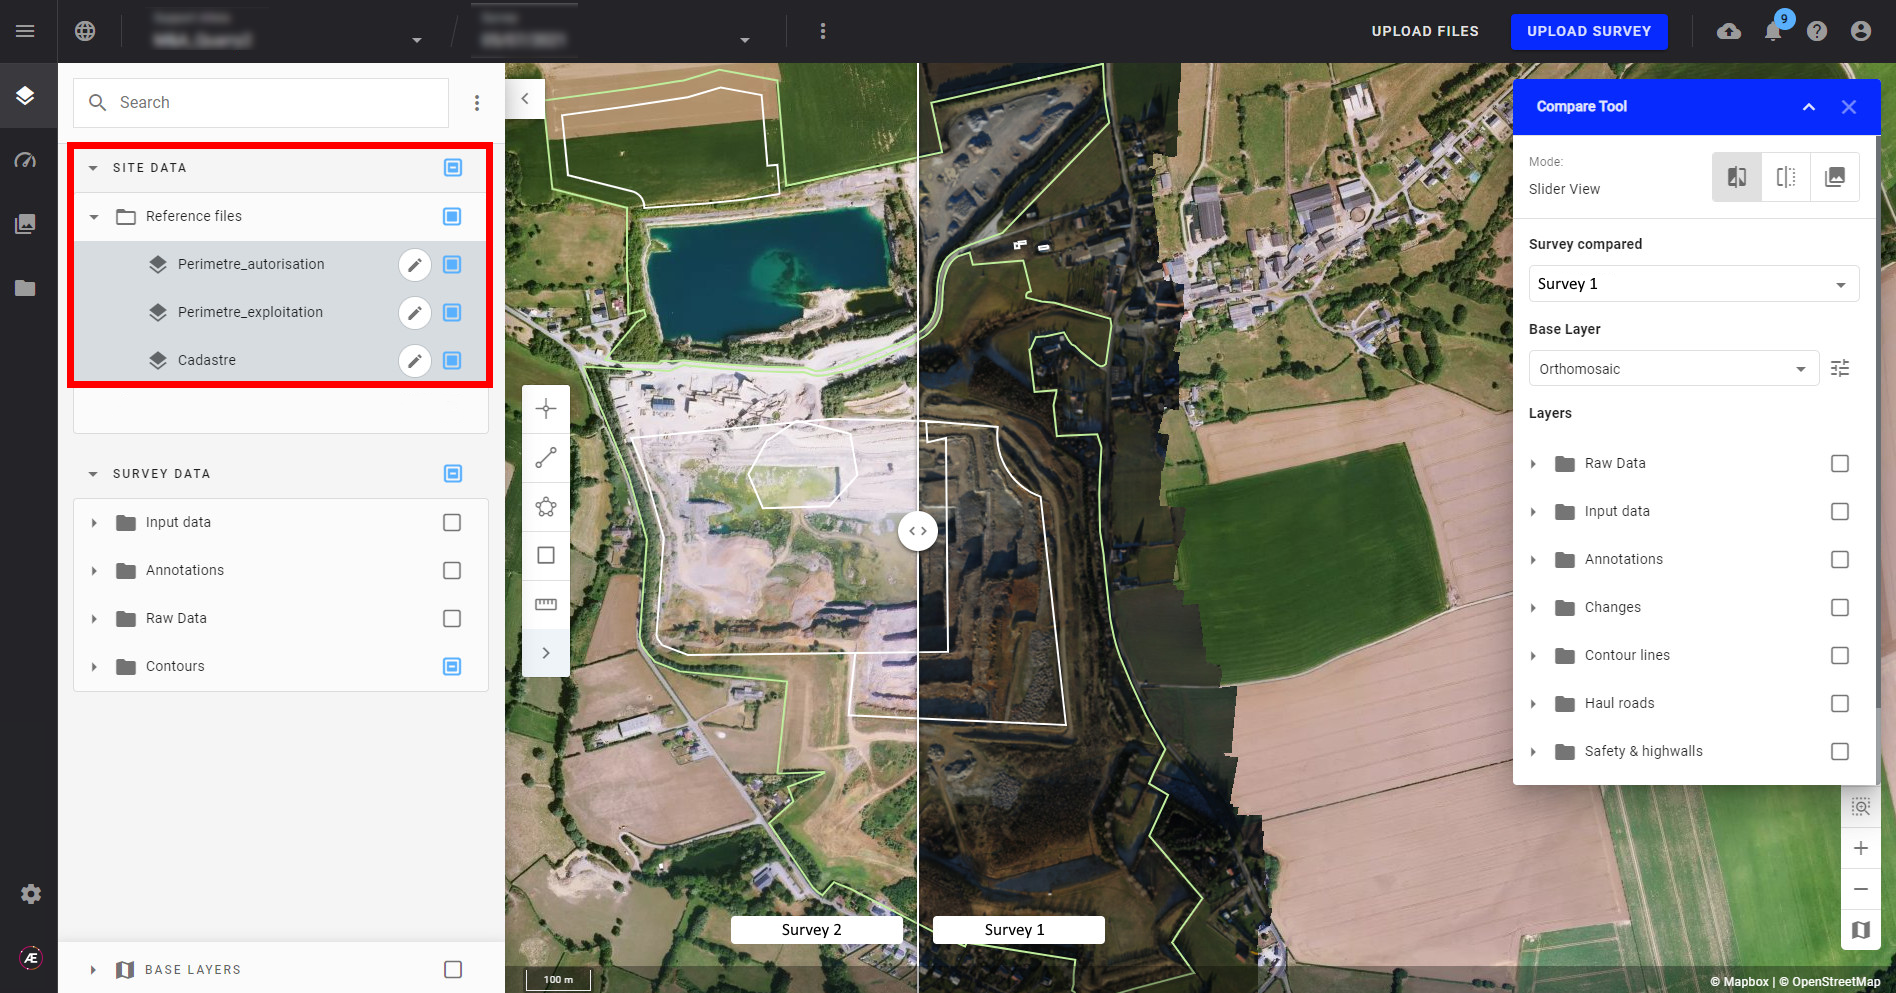
3. Visualize PROJECT DATA when using the Compare view
You can visualize the PROJECT DATA (Reference files and Annotations) while using the Compare View in any of the three view modes (slider, split, overlay).
4. Annotate and perform measurements in the Compare View
You can annotate your current survey while using the Compare View. You can also view the existing annotations of your current survey by selecting them on the Layer menu on the left (On the slider view, the survey is on the left side of the screen).
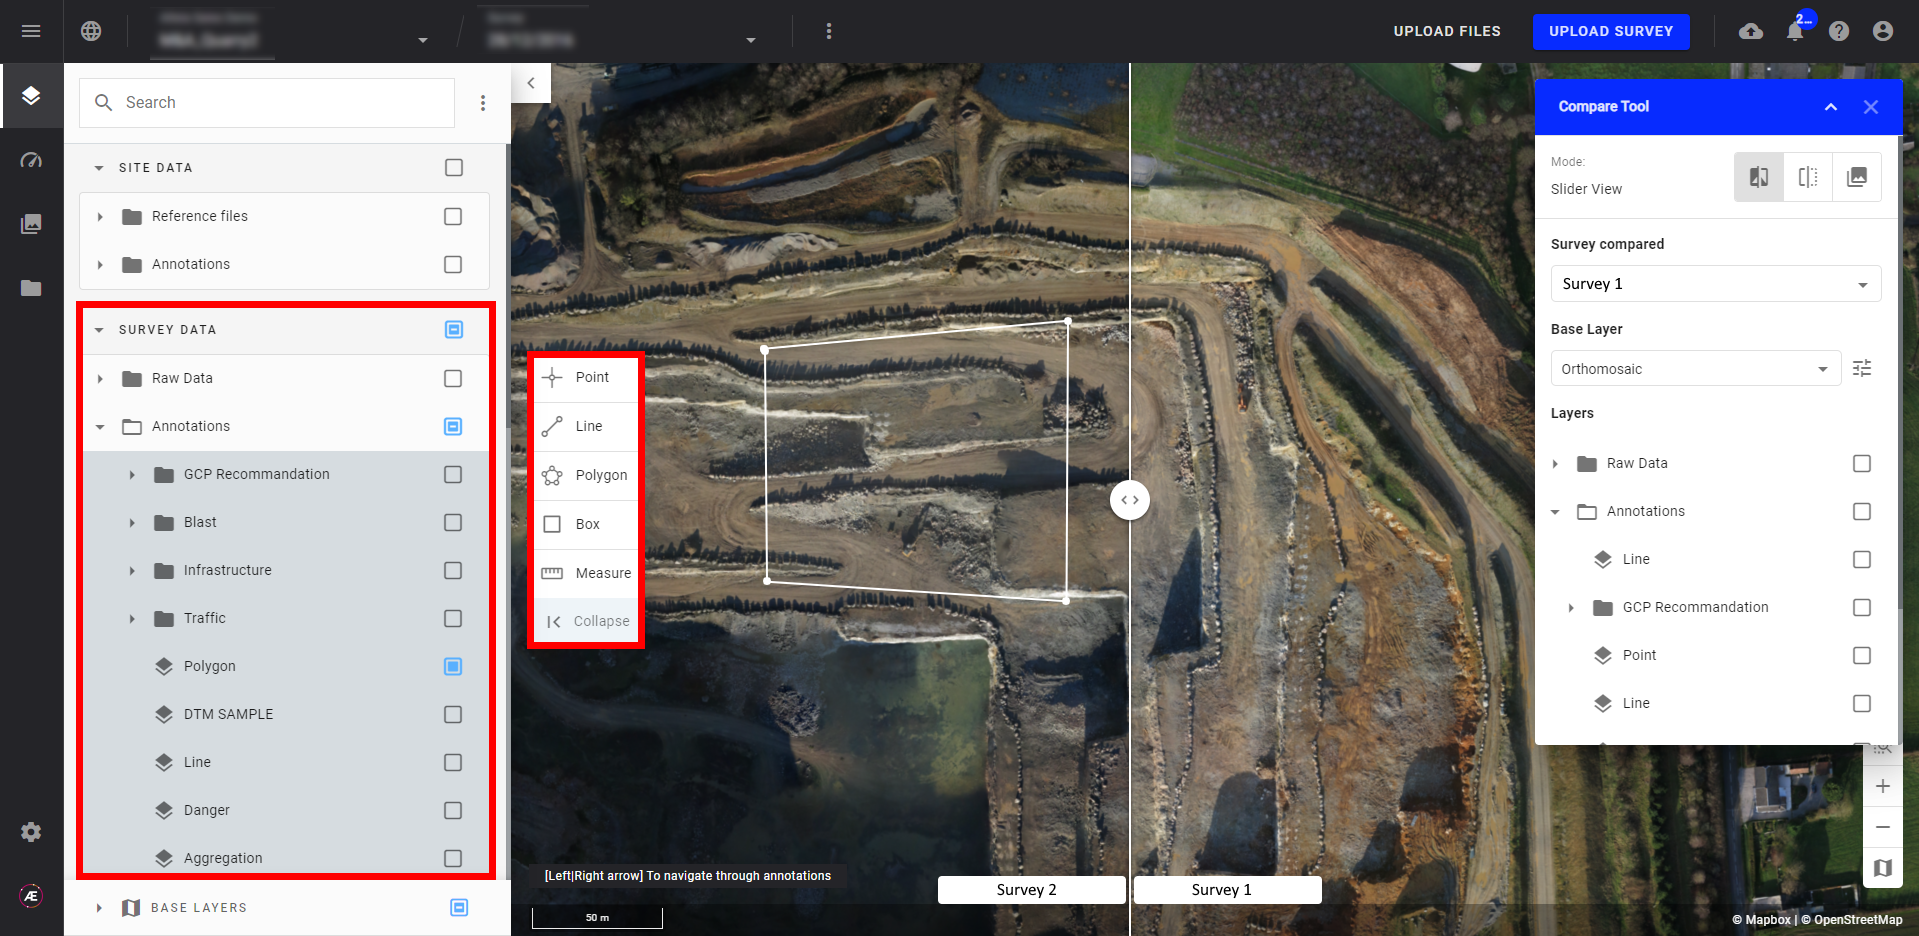
You can also perform measurements (point, distance and elevation profile, volume) on your current survey while using the Compare View.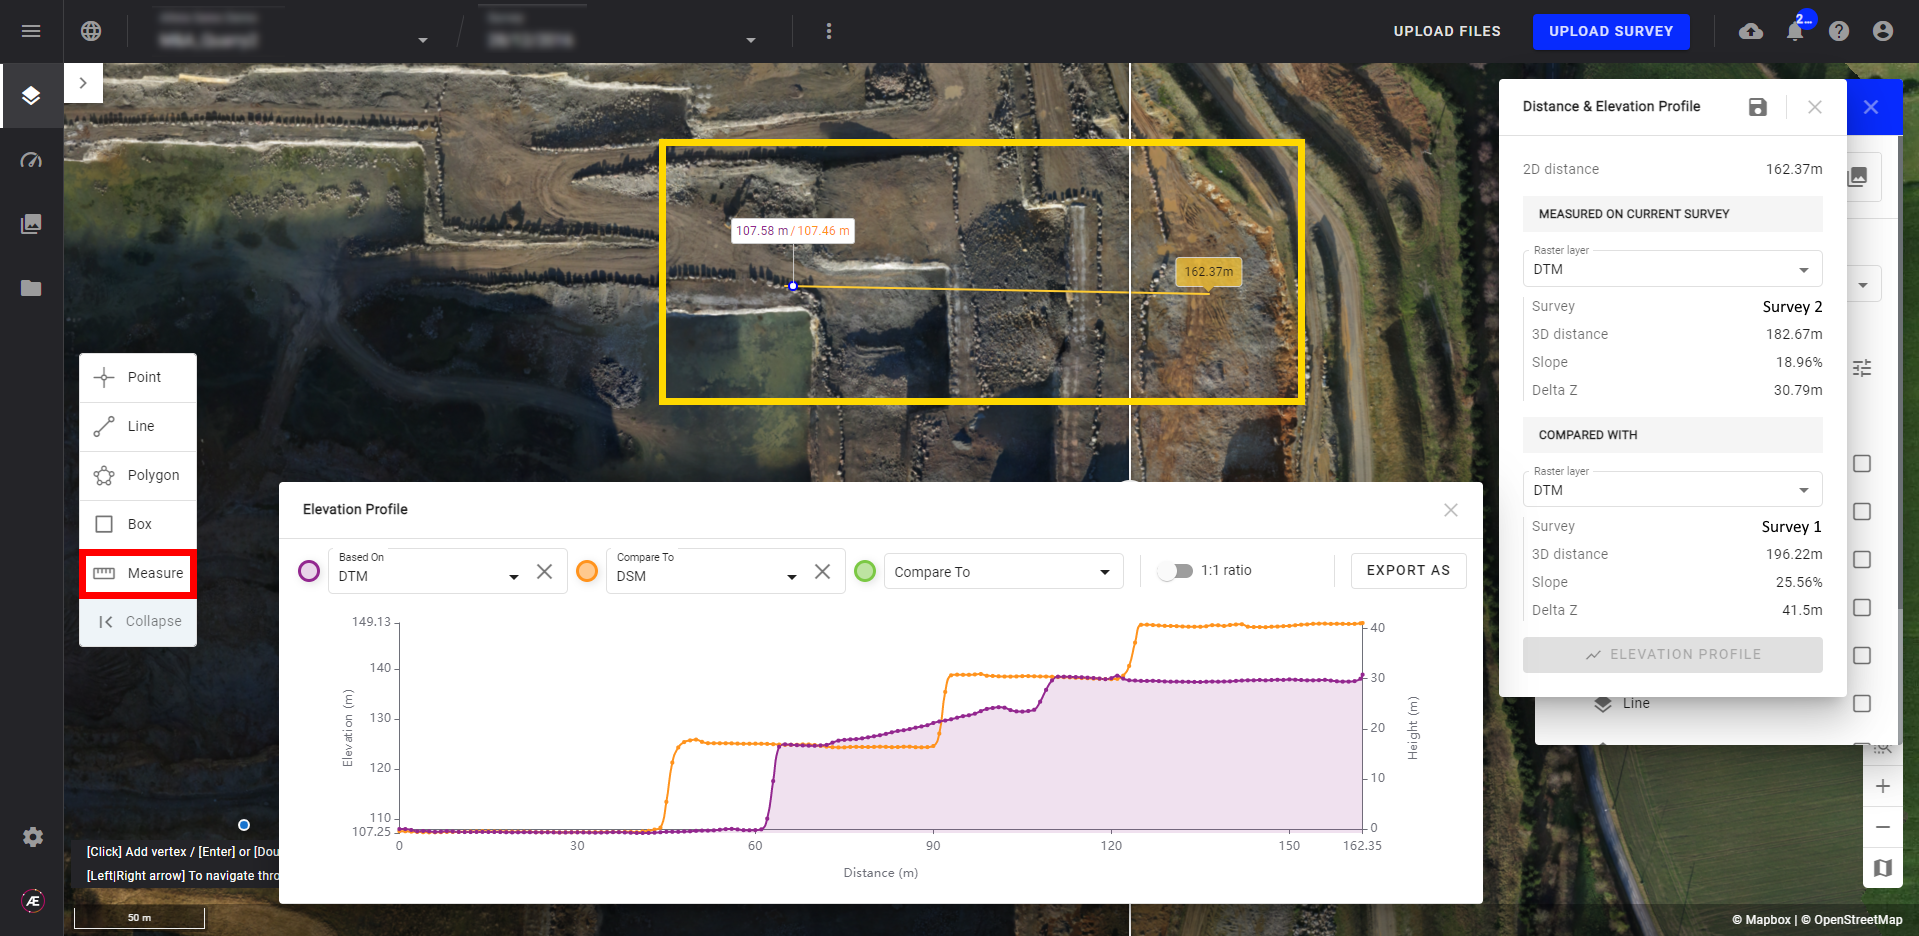
Learn more about how to use the Measurement tool.
5. 3D Compare View
You can adjust the style of the reference layer from the left panel, and the style of the compared layer from the "compare tool" window, by clicking on the red boxed buttons below.
As for 2D, you can annotate your current survey while using the Compare View. You can also view the existing annotations of your current survey by selecting them on the Layer menu on the left (On the slider view, the reference survey is on the left side of the screen).
Note : when slider view is active, you can create annotations on the right part of the slider (compared layer), but annotations will not be visible, because they are created on the reference survey.
To learn more about the 3D view, see 2D/3D viewer.
